Deploy a Playwright App on Leapcell (Node.js / Python)
If the solution below does not resolve your issue, feel free to join our Leapcell Discord community for further assistance.
You can deploy a Playwright service on Leapcell to generate screenshots, PDFs, crawl Single Page Apps, or automate testing of your frontend code.
You’ll need a GitHub account to proceed. If you don’t have one, you can create on the GitHub website.
1. Fork the Playwright Crawler on GitHub
Repo: Playwright Crawler (Node.js)
If you're using Python, you can try this version: Playwright Crawler (Python)
Here’s a simple Playwright script to generate a screenshot of a webpage, using an Express server to control the operation:
const express = require('express');
const app = express();
// Import Playwright's Chromium browser
const { chromium } = require('playwright');
const bodyParser = require('body-parser');
const base64 = require('base64-js');

// Set EJS as the template engine
app.set('view engine', 'ejs');
// Set the directory for views
app.set('views', __dirname + '/views');

// Use body-parser to parse form data
app.use(bodyParser.urlencoded({ extended: true }));

// Handle GET requests and render the initial page
app.get('/', (req, res) => {
  res.render('success', {
    url: 'https://news.ycombinator.com',
    screenshot_base64: '',
    links: [],
    page_title: null,
  });
});

// Handle POST requests to take a screenshot
app.post('/', async (req, res) => {
  // Get the URL from the form, default to Hacker News
  let url = req.body.url || 'https://news.ycombinator.com';
  // Add 'https://' if the URL doesn't start with 'http'
  if (!url.startsWith('http')) {
    url = 'https://' + url;
  }

  let browser;
  try {
    // Launch the Chromium browser with specific arguments
    browser = await chromium.launch({
      headless: true,
      args: ['--single-process', '--no-sandbox', '--disable-setuid-sandbox'],
    });
    // Create a new browser page
    const page = await browser.newPage();
    // Navigate to the specified URL
    await page.goto(url);
    // Take a screenshot of the page
    const screenshot = await page.screenshot();
    // Get the page title
    const page_title = await page.title();

    // Extract all <a> tags' links and text content
    const links_and_texts = await page.evaluate(() => {
      const anchors = document.querySelectorAll('a');
      return Array.from(anchors).map((anchor) => {
        const text = anchor.textContent.replace(/<[^>]*>/g, '').trim();
        return {
          href: anchor.href,
          text: text,
        };
      });
    });

    // Convert the screenshot to a base64 string
    const screenshot_base64 = base64.fromByteArray(screenshot);

    // Render the success page with relevant data
    res.render('success', {
      url,
      page_title,
      screenshot_base64,
      links: links_and_texts,
    });
  } catch (e) {
    // Close the browser if an error occurs
    if (browser) {
      await browser.close();
    }
    // Render the error page with the error message
    res.render('error', { error_message: e.message });
  } finally {
    // Ensure the browser is closed after all operations
    if (browser) {
      await browser.close();
    }
  }
});

// Set the port, use environment variable PORT or default to 8080
const port = process.env.PORT || 8080;
// Start the server
app.listen(port, () => {
  console.log(`Server is running on port ${port}`);
});
Prerequisites
Before running the application, you need to prepare the Playwright environment. To do so, execute the following script:
sh prepare_playwright_env.sh
This will:
- Install Playwright and its dependencies (including Chromium) with the specified version.
- Install the required Node.js modules by running
npm install.
Project Structure
.
├── LICENSE                           # License file for the project
├── package.json                      # Contains metadata and dependencies for the Node.js project
├── prepare_playwright_env.sh          # Script for setting up the Playwright environment
└── src
    ├── app.js                        # Main application entry point using Express and Playwright
    └── views
        ├── error.ejs                 # Error page template displayed when something goes wrong
        ├── partials
        │   └── header.ejs            # Header template shared across pages
        └── success.ejs               # Success page template, showing the scraped links
Running the Application
Once you've prepared the environment, you can start the web service with the following command:
npm start
The service will be available on http://localhost:8080, and you can input the URL of the page you want to scrape. It will return a list of all links on that page.
Explanation of prepare_playwright_env.sh
This script is responsible for setting up the environment necessary for Playwright to run. Here's a breakdown of what each line does:
#!/bin/sh

# Install playwright and its dependencies
npx -y playwright@latest install --with-deps chromium

# Install node modules
npm install
npx -y playwright@1.50.1 install --with-deps chromium: This command installs Playwright version 1.50.1 and its necessary dependencies (including Chromium). It ensures the correct environment for the web scraping tasks.npm install: Installs the Node.js modules specified inpackage.json.
2. Create a Service in the Leapcell Dashboard and Connect Your Repo
Go to the Leapcell Dashboard and click the New Service button.
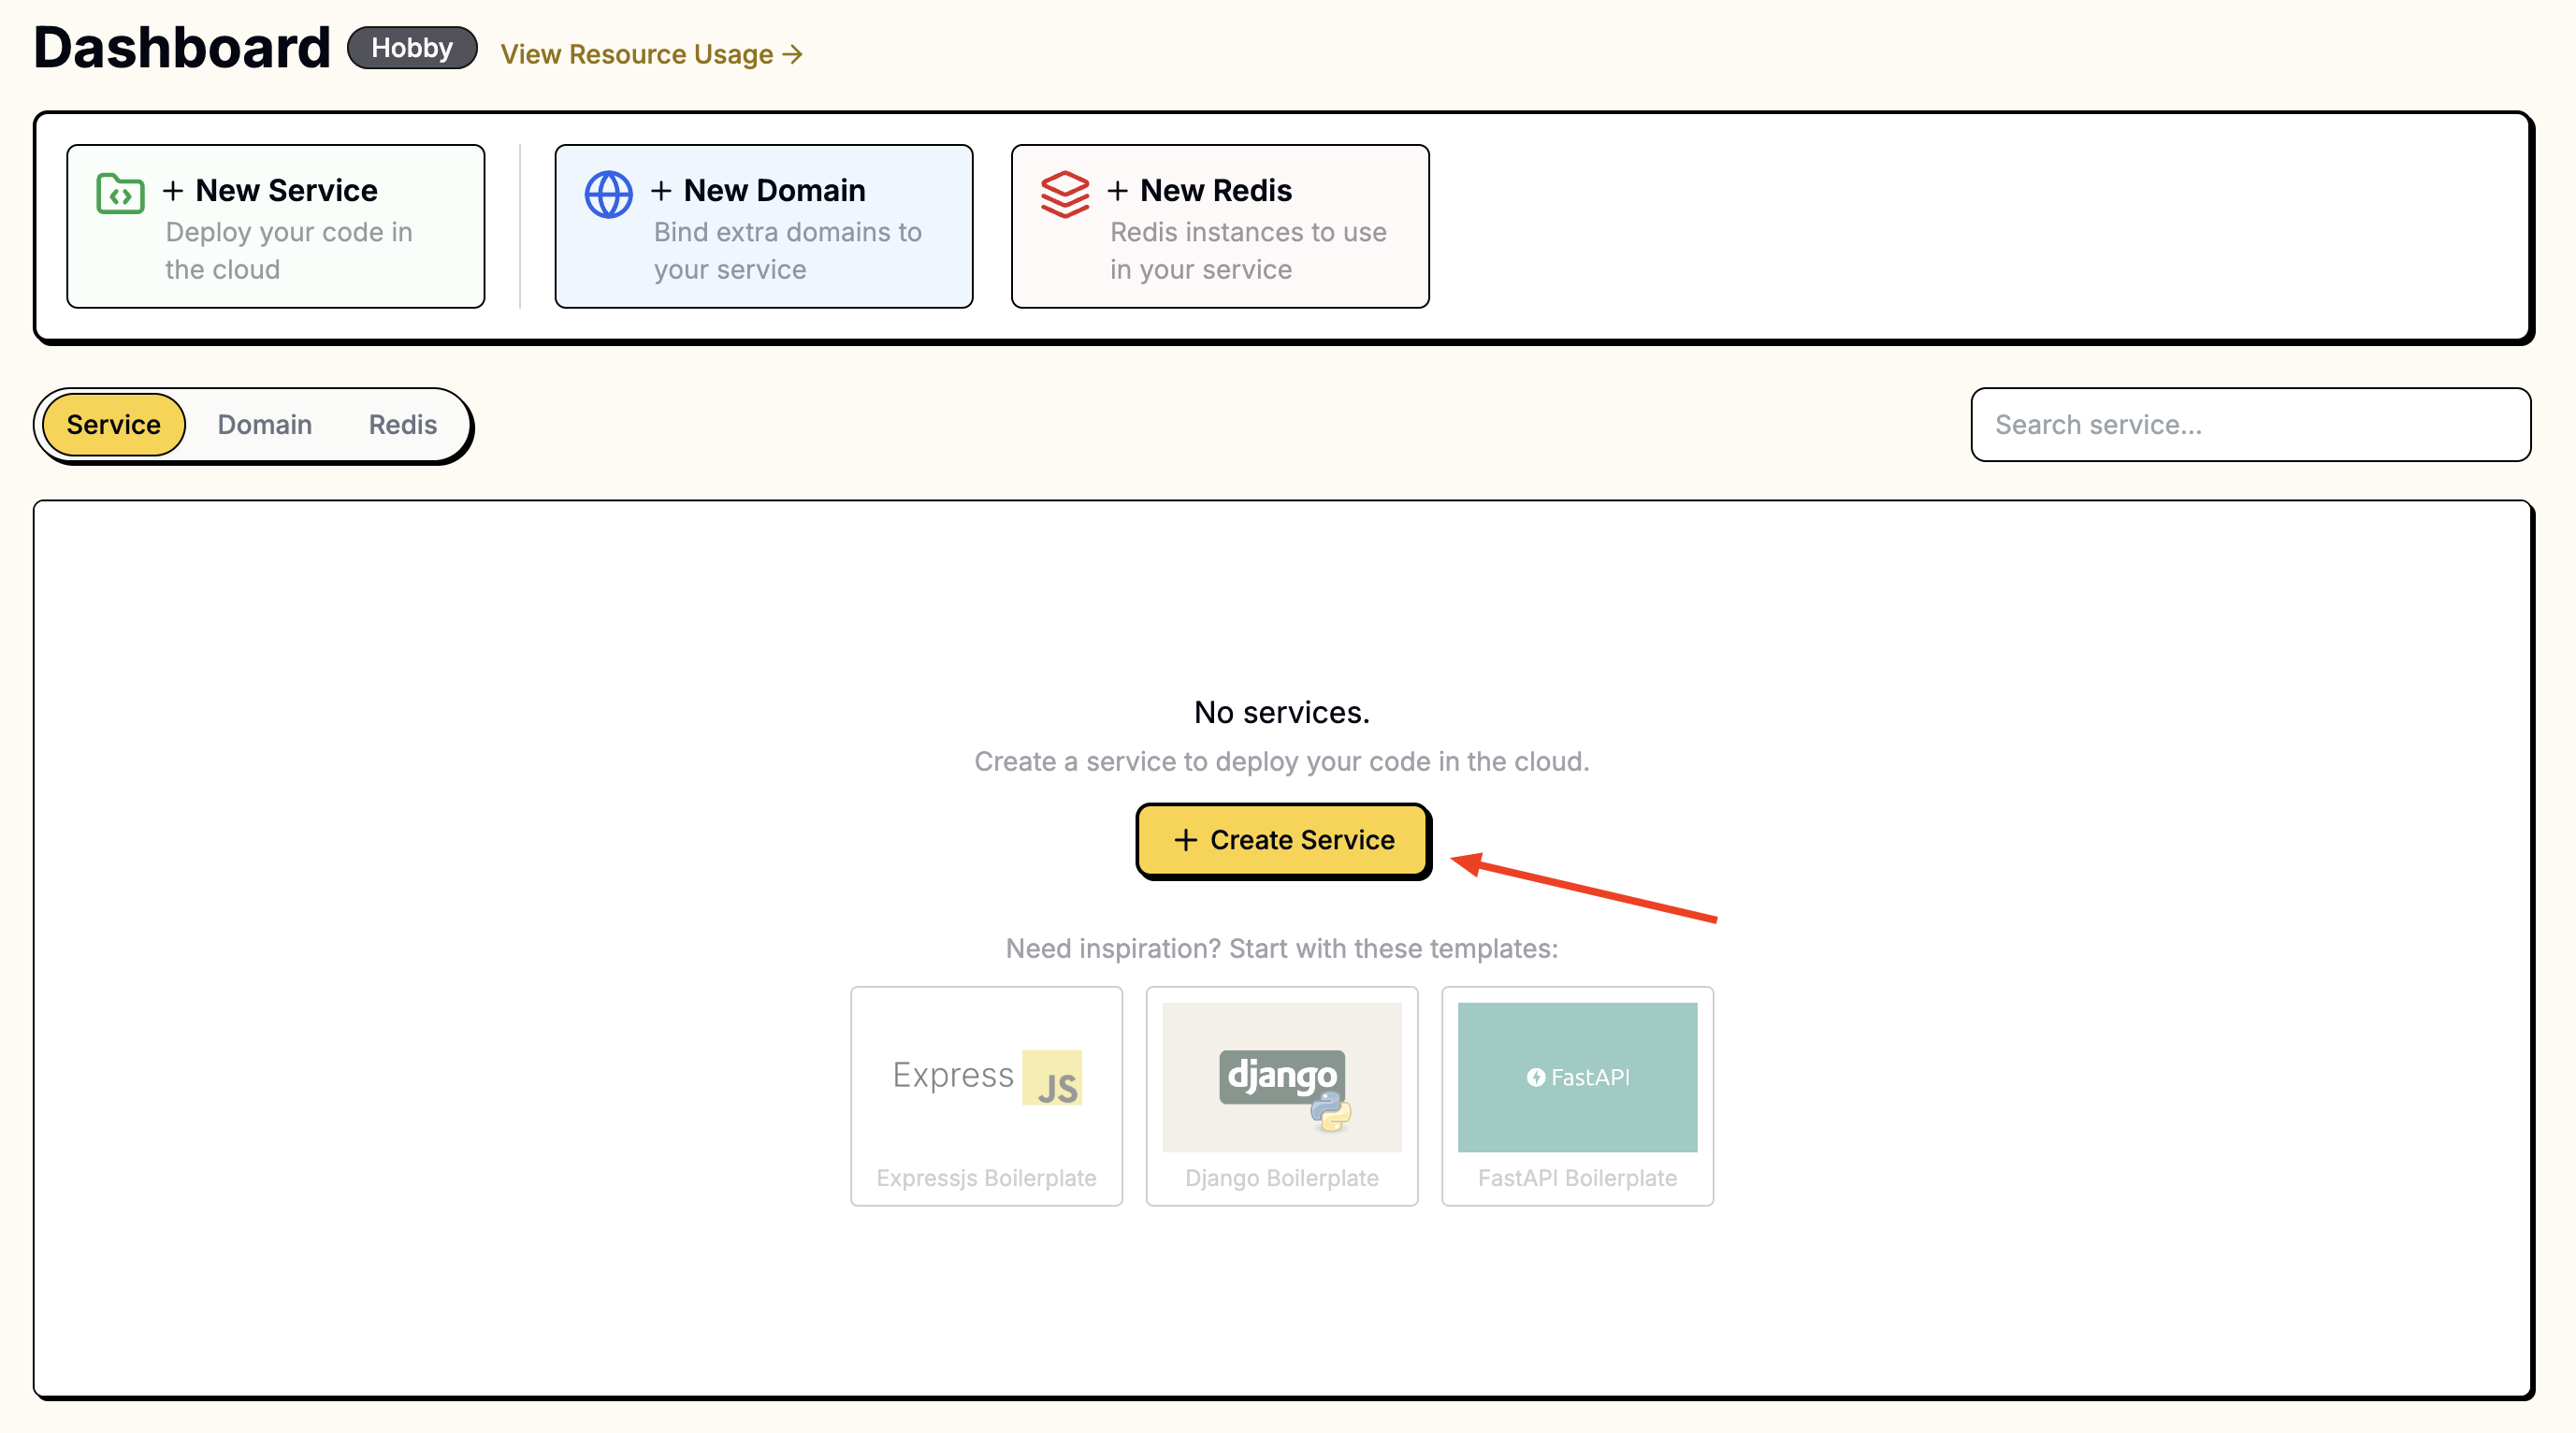
On the "New Service" page, select the repository you just forked.
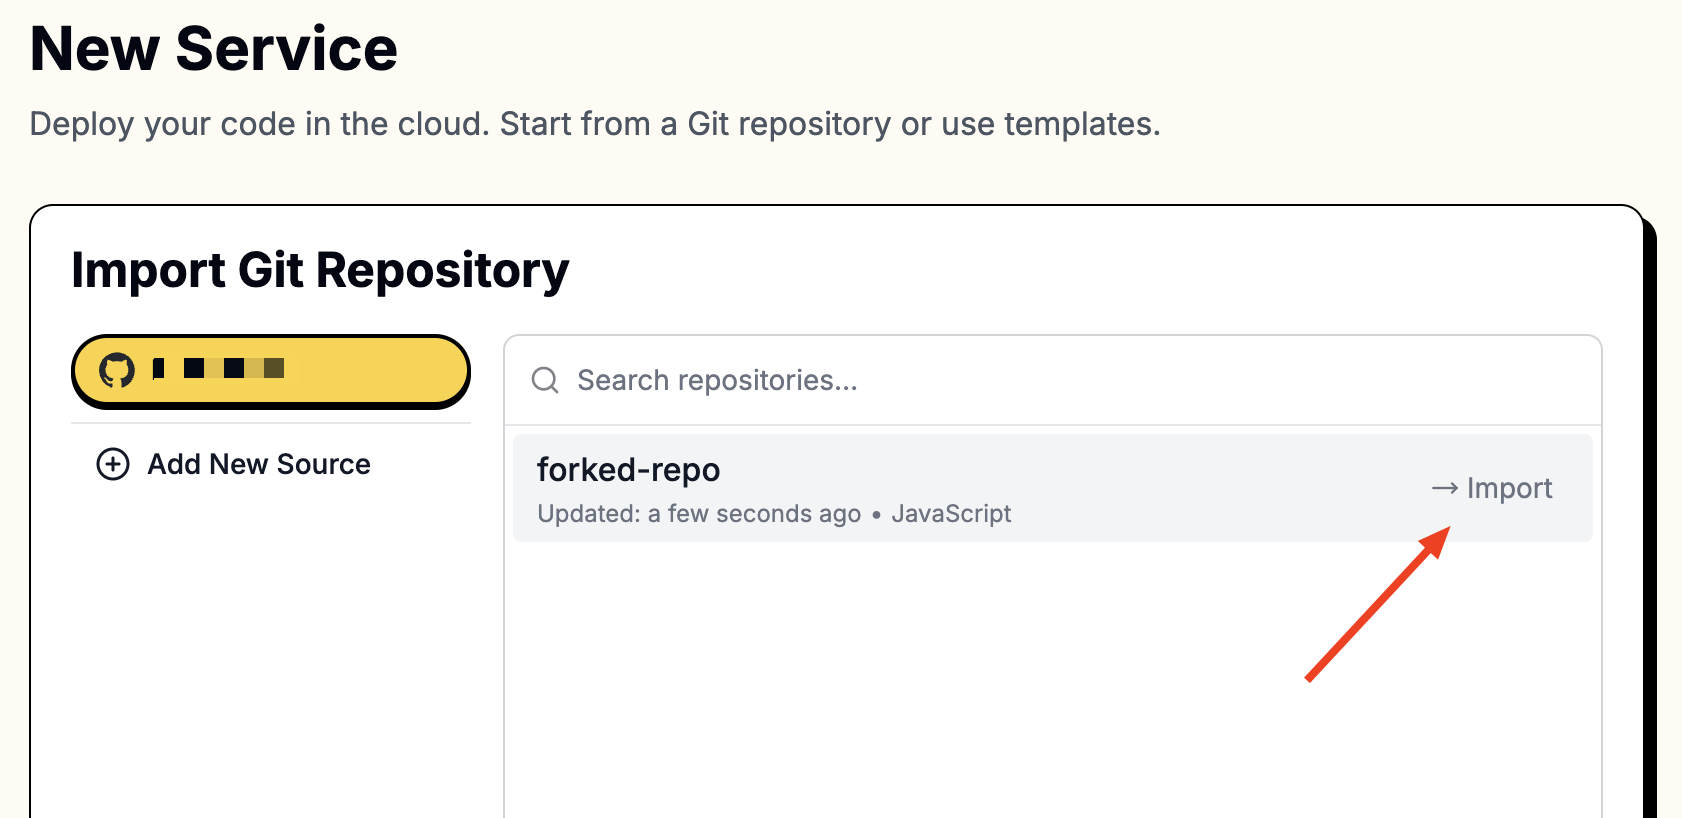
To access your repositories, you’ll need to connect Leapcell to your GitHub account.
Follow these instructions to connect to GitHub.
Once connected, your repositories will appear in the list.
3. Fill in the Following Values During Service Creation
Since Playwright requires browser engines like Chromium, WebKit, and Firefox, you need to install dependencies. It’s recommended to run the installation command separately.
Here’s the final installation command:
sh prepare_playwright_env.sh && npm install
For this example, we use an Express app to control Playwright operations. The start command is npm run start.
| Field | Value |
|---|---|
| Runtime | Node.js (Any version) |
| Build Command | sh prepare_playwright_env.sh && npm install |
| Start Command | npm run start |
| Port | 8080 |
Enter these values in the corresponding fields.

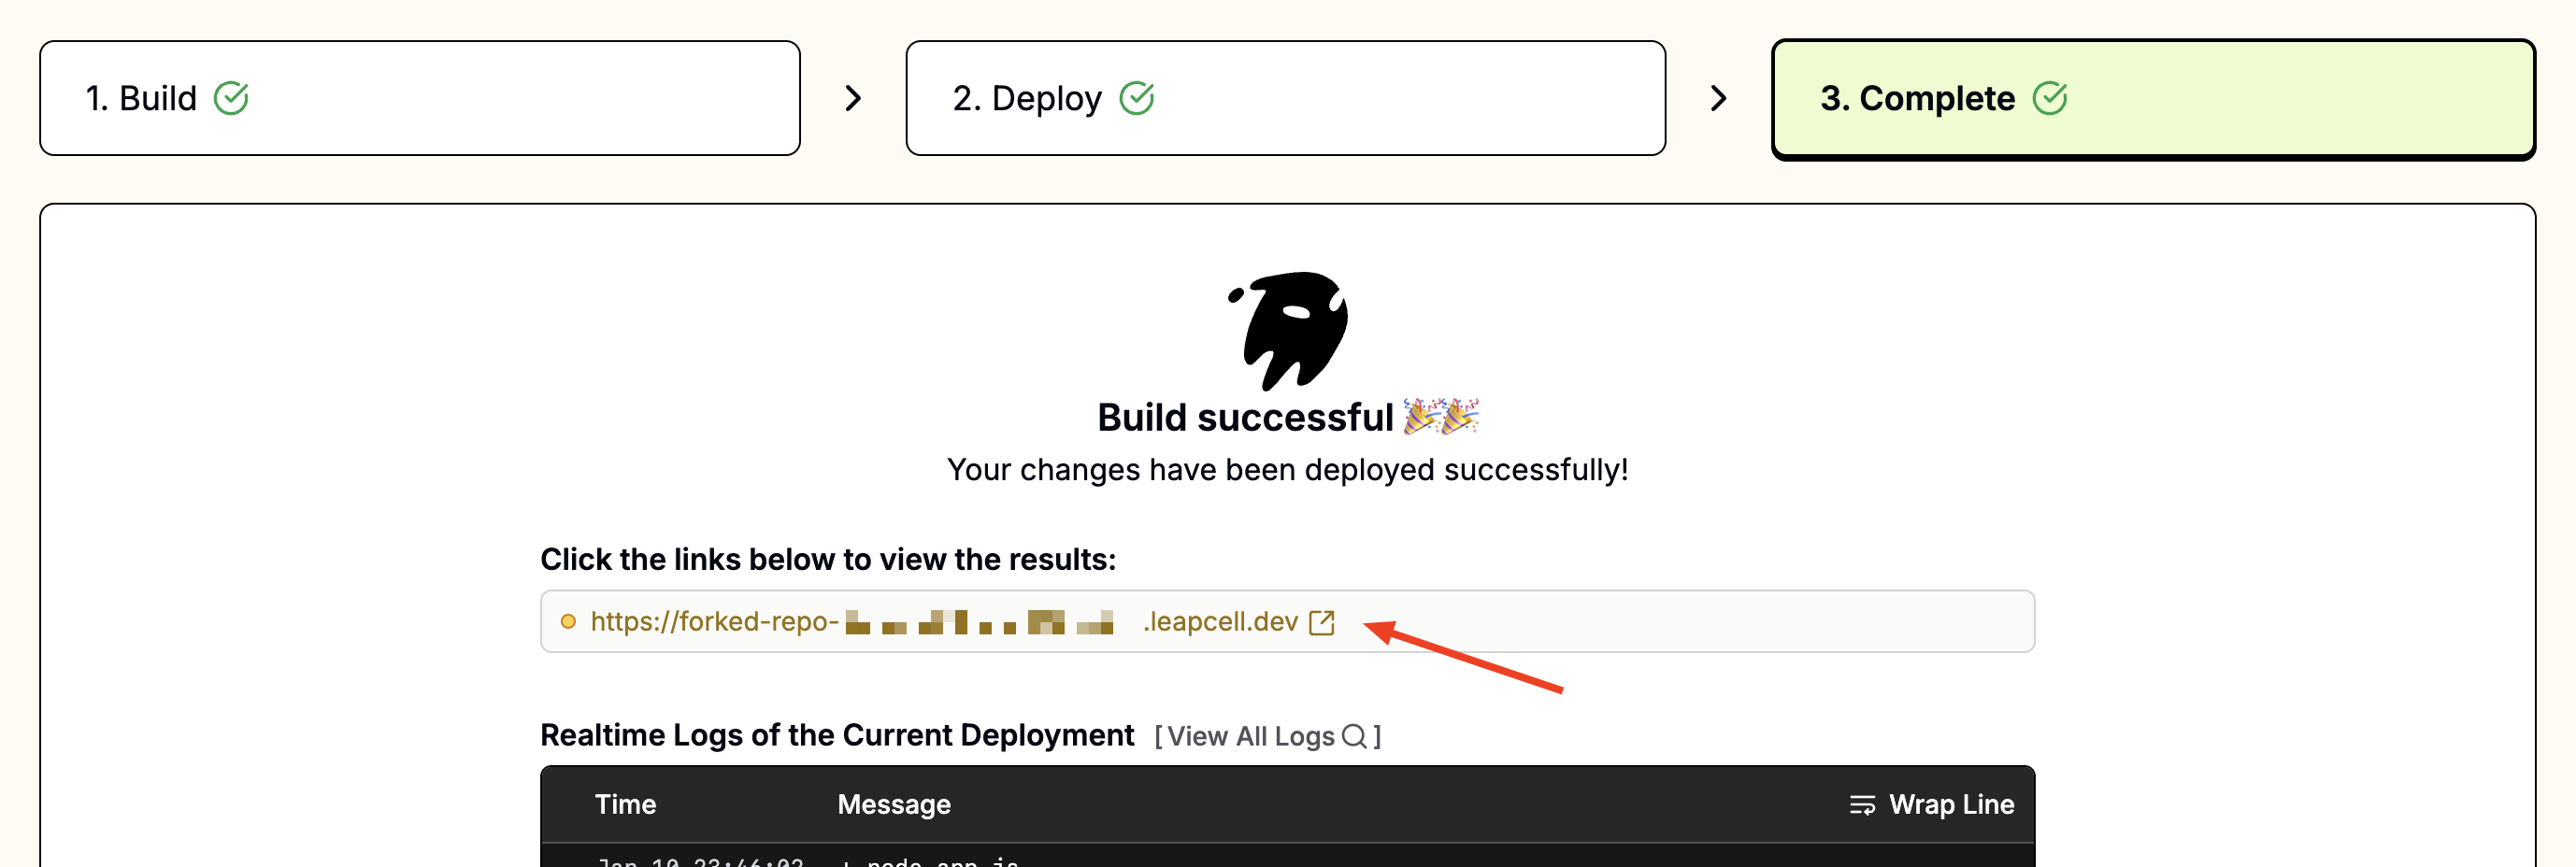
4. Access Your App
Once deployed, you’ll see a URL like foo-bar.leapcell.dev on the Deployment page. Visit the domain to test your application.
Continuous Deployments
Every push to the linked branch automatically triggers a build and deploy. Failed builds are safely canceled, and the current version remains live until the next successful deployment.
Learn more about Continuous Deployments.