LeapcellにHugging Faceアプリをデプロイする
このチュートリアルでは、Hugging Face ResNetモデルを使用して画像分類アプリケー�ションをデプロイする方法を説明します。
デプロイプロセスは他のHugging Faceモデルでも同様です。モデルとプロセッサの名前を変更するだけで済みます。
続行するにはGitHubアカウントが必要です。お持ちでない場合は、GitHubのウェブサイトで作成できます。
1. GitHubでHugging Face画像分類の例をフォークします。
リポジトリ: Hugging Face画像分類の例
この例では、Hugging Faceのtransformersライブラリからの事前学習済みモデルを使用して画像を分類します。そのリポジトリのmain.py ファイルは次のようになります。
まず、モデルとプロセッサをロードするためのload_model.pyファイルが必要です。
from transformers import AutoImageProcessor, ResNetForImageClassification

MODEL_PATH = "./model"

model_name = "microsoft/resnet-50"

model = ResNetForImageClassification.from_pretrained(model_name)
processor = AutoImageProcessor.from_pretrained(model_name)

# Save to the specified path
model.save_pretrained(MODEL_PATH)
processor.save_pretrained(MODEL_PATH)
次に、Flaskアプリケーションを起動するためのapp.pyファイルが必要です。
from flask import Flask, request
from PIL import Image
from transformers import AutoImageProcessor, ResNetForImageClassification
import torch
import base64
from io import BytesIO
import time

app = Flask(__name__)

# Path to the locally saved model
MODEL_PATH = "./model"

# HTML templates
INDEX_HTML = """
<!DOCTYPE html>
<html>
<body>
<form action="/predict" method="post" enctype="multipart/form-data">
    <label>Select image to upload:</label>
    <input type="file" name="image">
    <input type="submit" value="Upload Image">
</form>
</body>
</html>
"""

RESPONSE_HTML = """
<!DOCTYPE html>
<html>
<body>
<img src="data:image/png;base64,{img_base64}" alt="image" width="500" height="600">
<form action="/predict" method="post" enctype="multipart/form-data">
    <label>Select image to upload:</label>
    <input type="file" name="image">
    <input type="submit" value="Upload Image">
</form>
<p>Prediction: {prediction}</p>
<p>Score: {score:.2f}</p>
<p>Time taken: {time_taken:.2f} seconds</p>
</body>
</html>
"""

# Load the model and processor from the local path
model = ResNetForImageClassification.from_pretrained(MODEL_PATH)
processor = AutoImageProcessor.from_pretrained(MODEL_PATH)


@app.route("/")
def index():
    """Render the upload page."""
    return INDEX_HTML


@app.route("/predict", methods=["POST"])
def predict():
    """Handle image upload, make predictions, and return results."""
    start_time = time.time()

    # Get the uploaded image file
    img_file = request.files.get("image")
    if not img_file:
        return "No image uploaded. Please upload a valid image."

    # Process the image for prediction
    img = Image.open(img_file)
    inputs = processor(img, return_tensors="pt")
    with torch.no_grad():
        logits = model(**inputs).logits
        predicted_label = logits.argmax(-1).item()
        confidence_score = torch.softmax(logits, dim=-1)[0, predicted_label].item()

    # Encode the image in Base64 to display it in the HTML response
    buffer = BytesIO()
    img.save(buffer, format="PNG")
    img_base64 = base64.b64encode(buffer.getvalue()).decode("utf-8")

    # Calculate elapsed time
    time_taken = time.time() - start_time

    # Return the HTML with prediction results
    return RESPONSE_HTML.format(
        img_base64=img_base64,
        prediction=predicted_label,
        score=confidence_score,
        time_taken=time_taken,
    )


# Run the Flask application
if __name__ == "__main__":
    app.run(host="0.0.0.0", port=8080)
2. Leapcellダッシュボードでサービスを作成し、新しいリポジトリを接続します。
Leapcellダッシュボードにアクセスし、New Serviceボタンをクリックします。
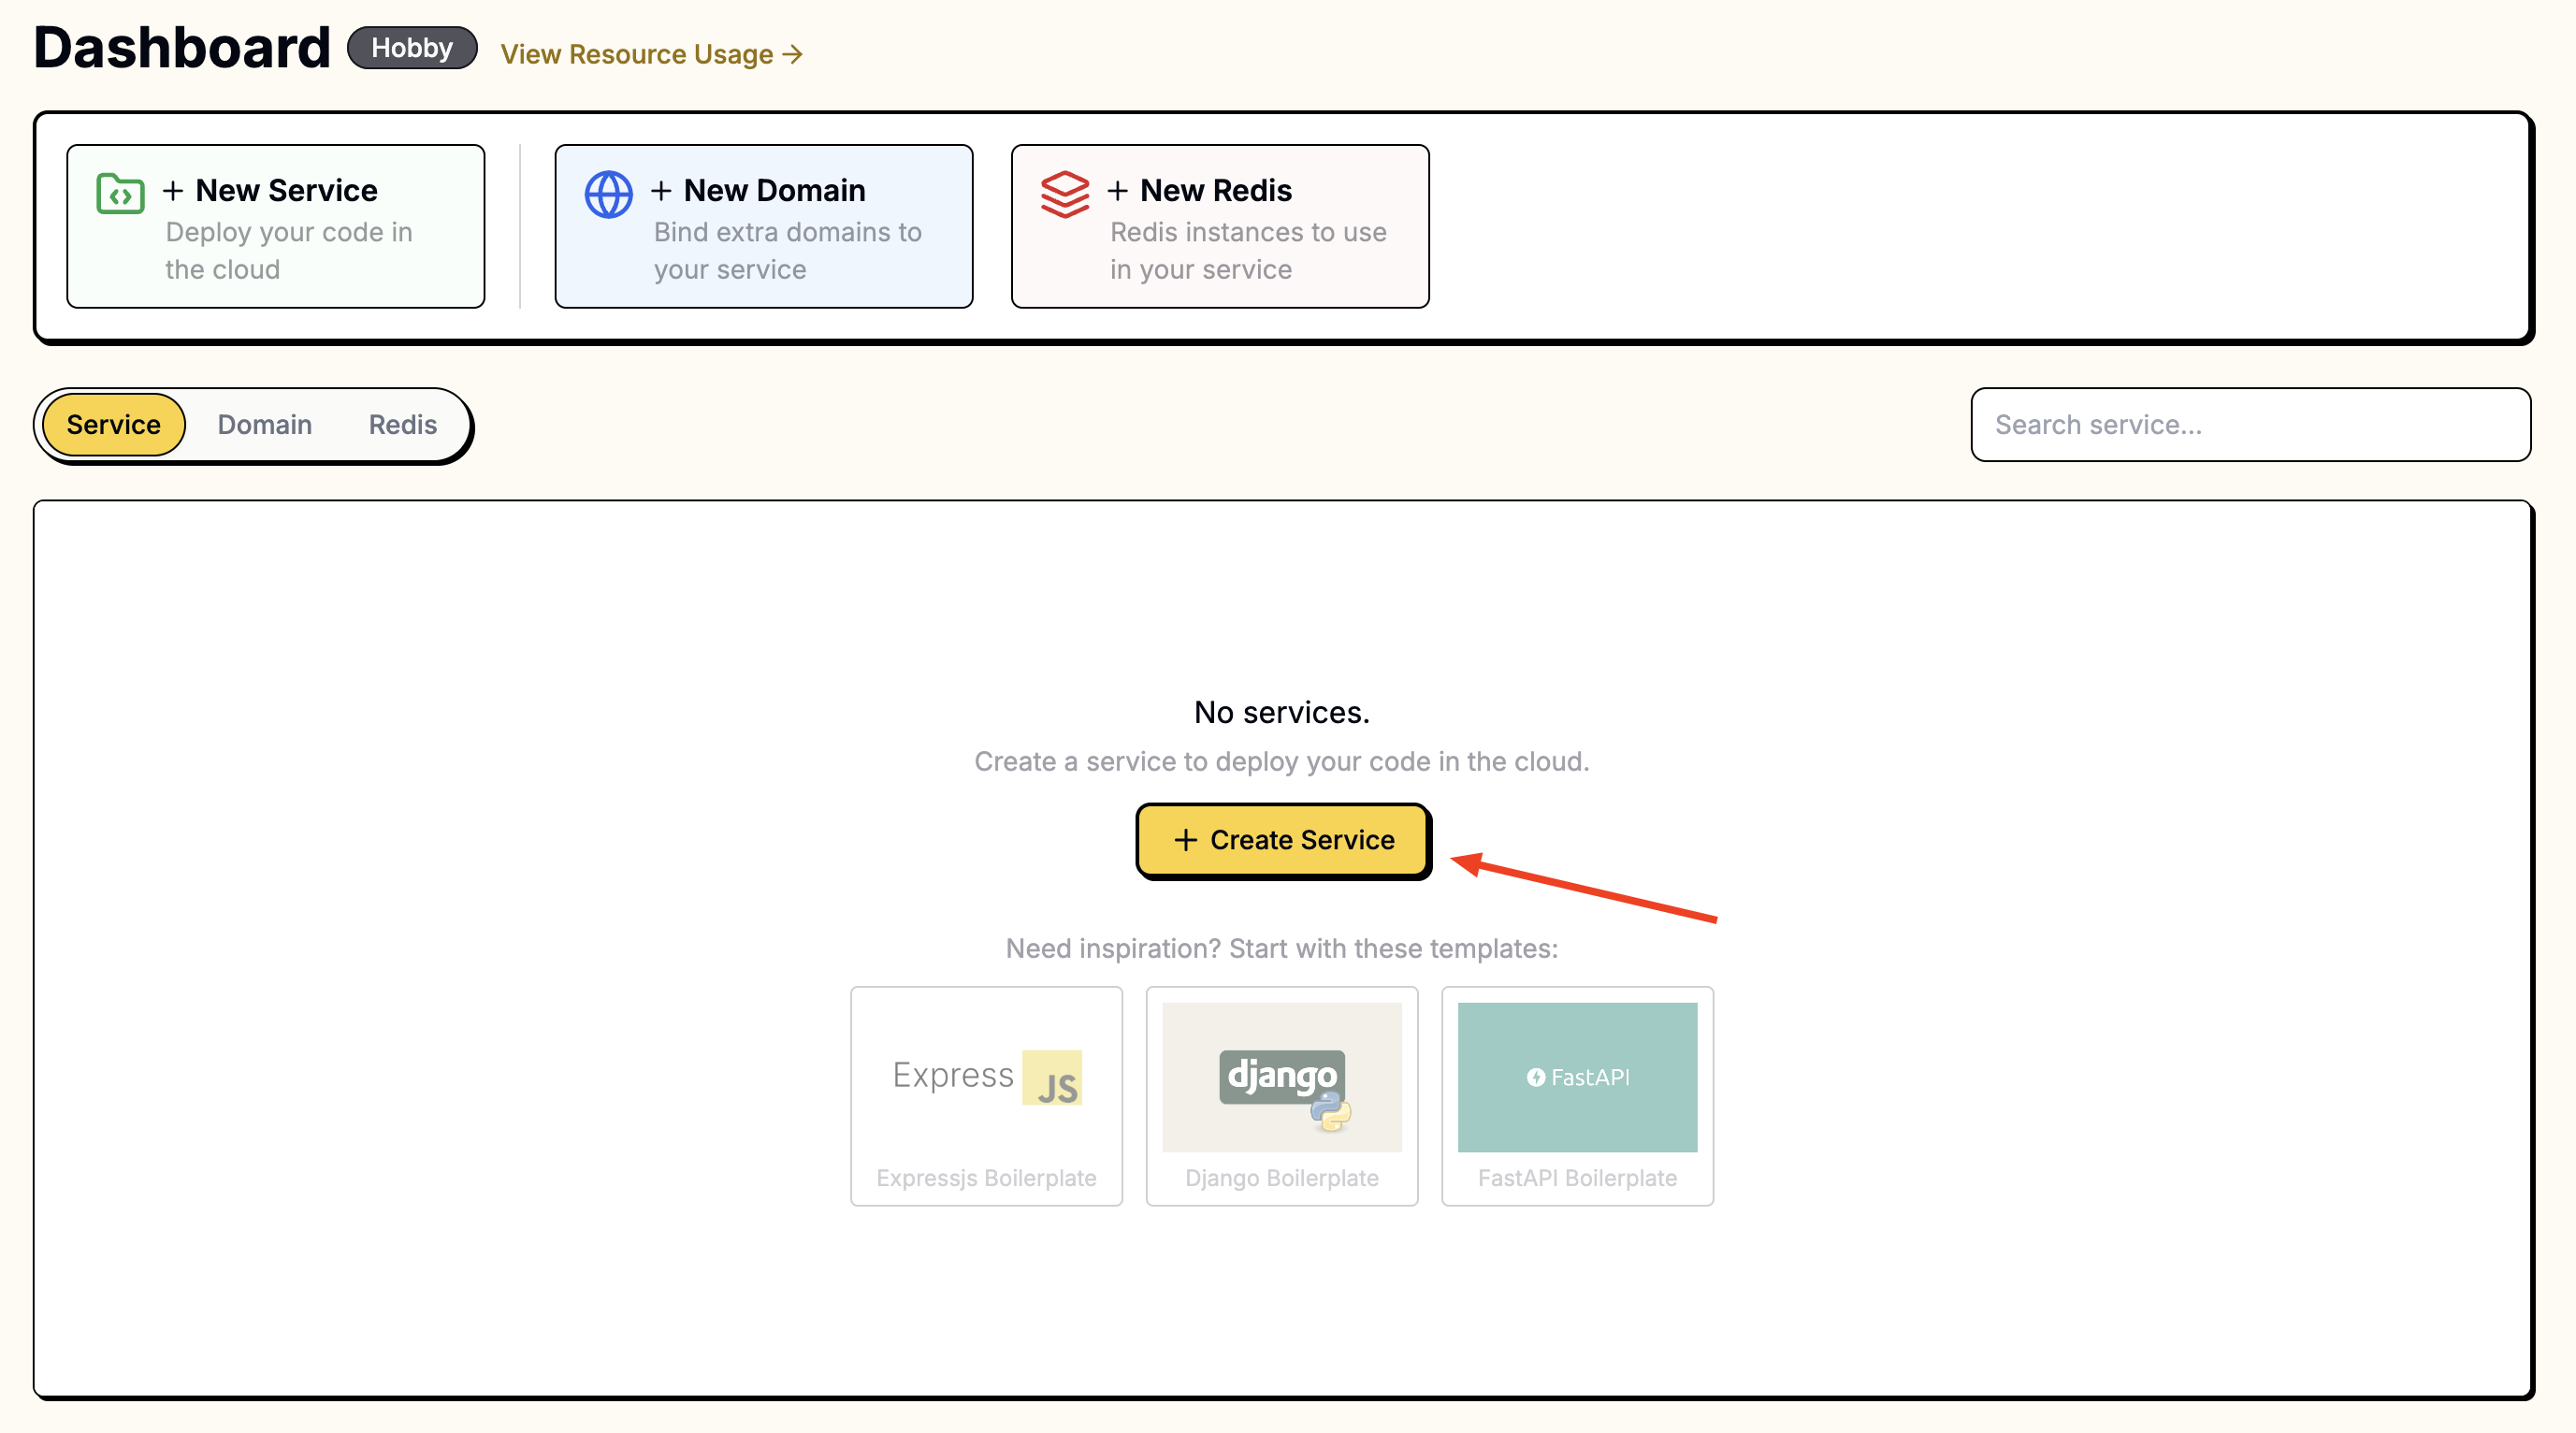
「New Service」ページで、フォークしたリポジトリを選択します。

リポジトリにアクセスするには、LeapcellをGitHubアカウントに接続する必要があります。
接続すると、リポジトリがリストに表示されます。
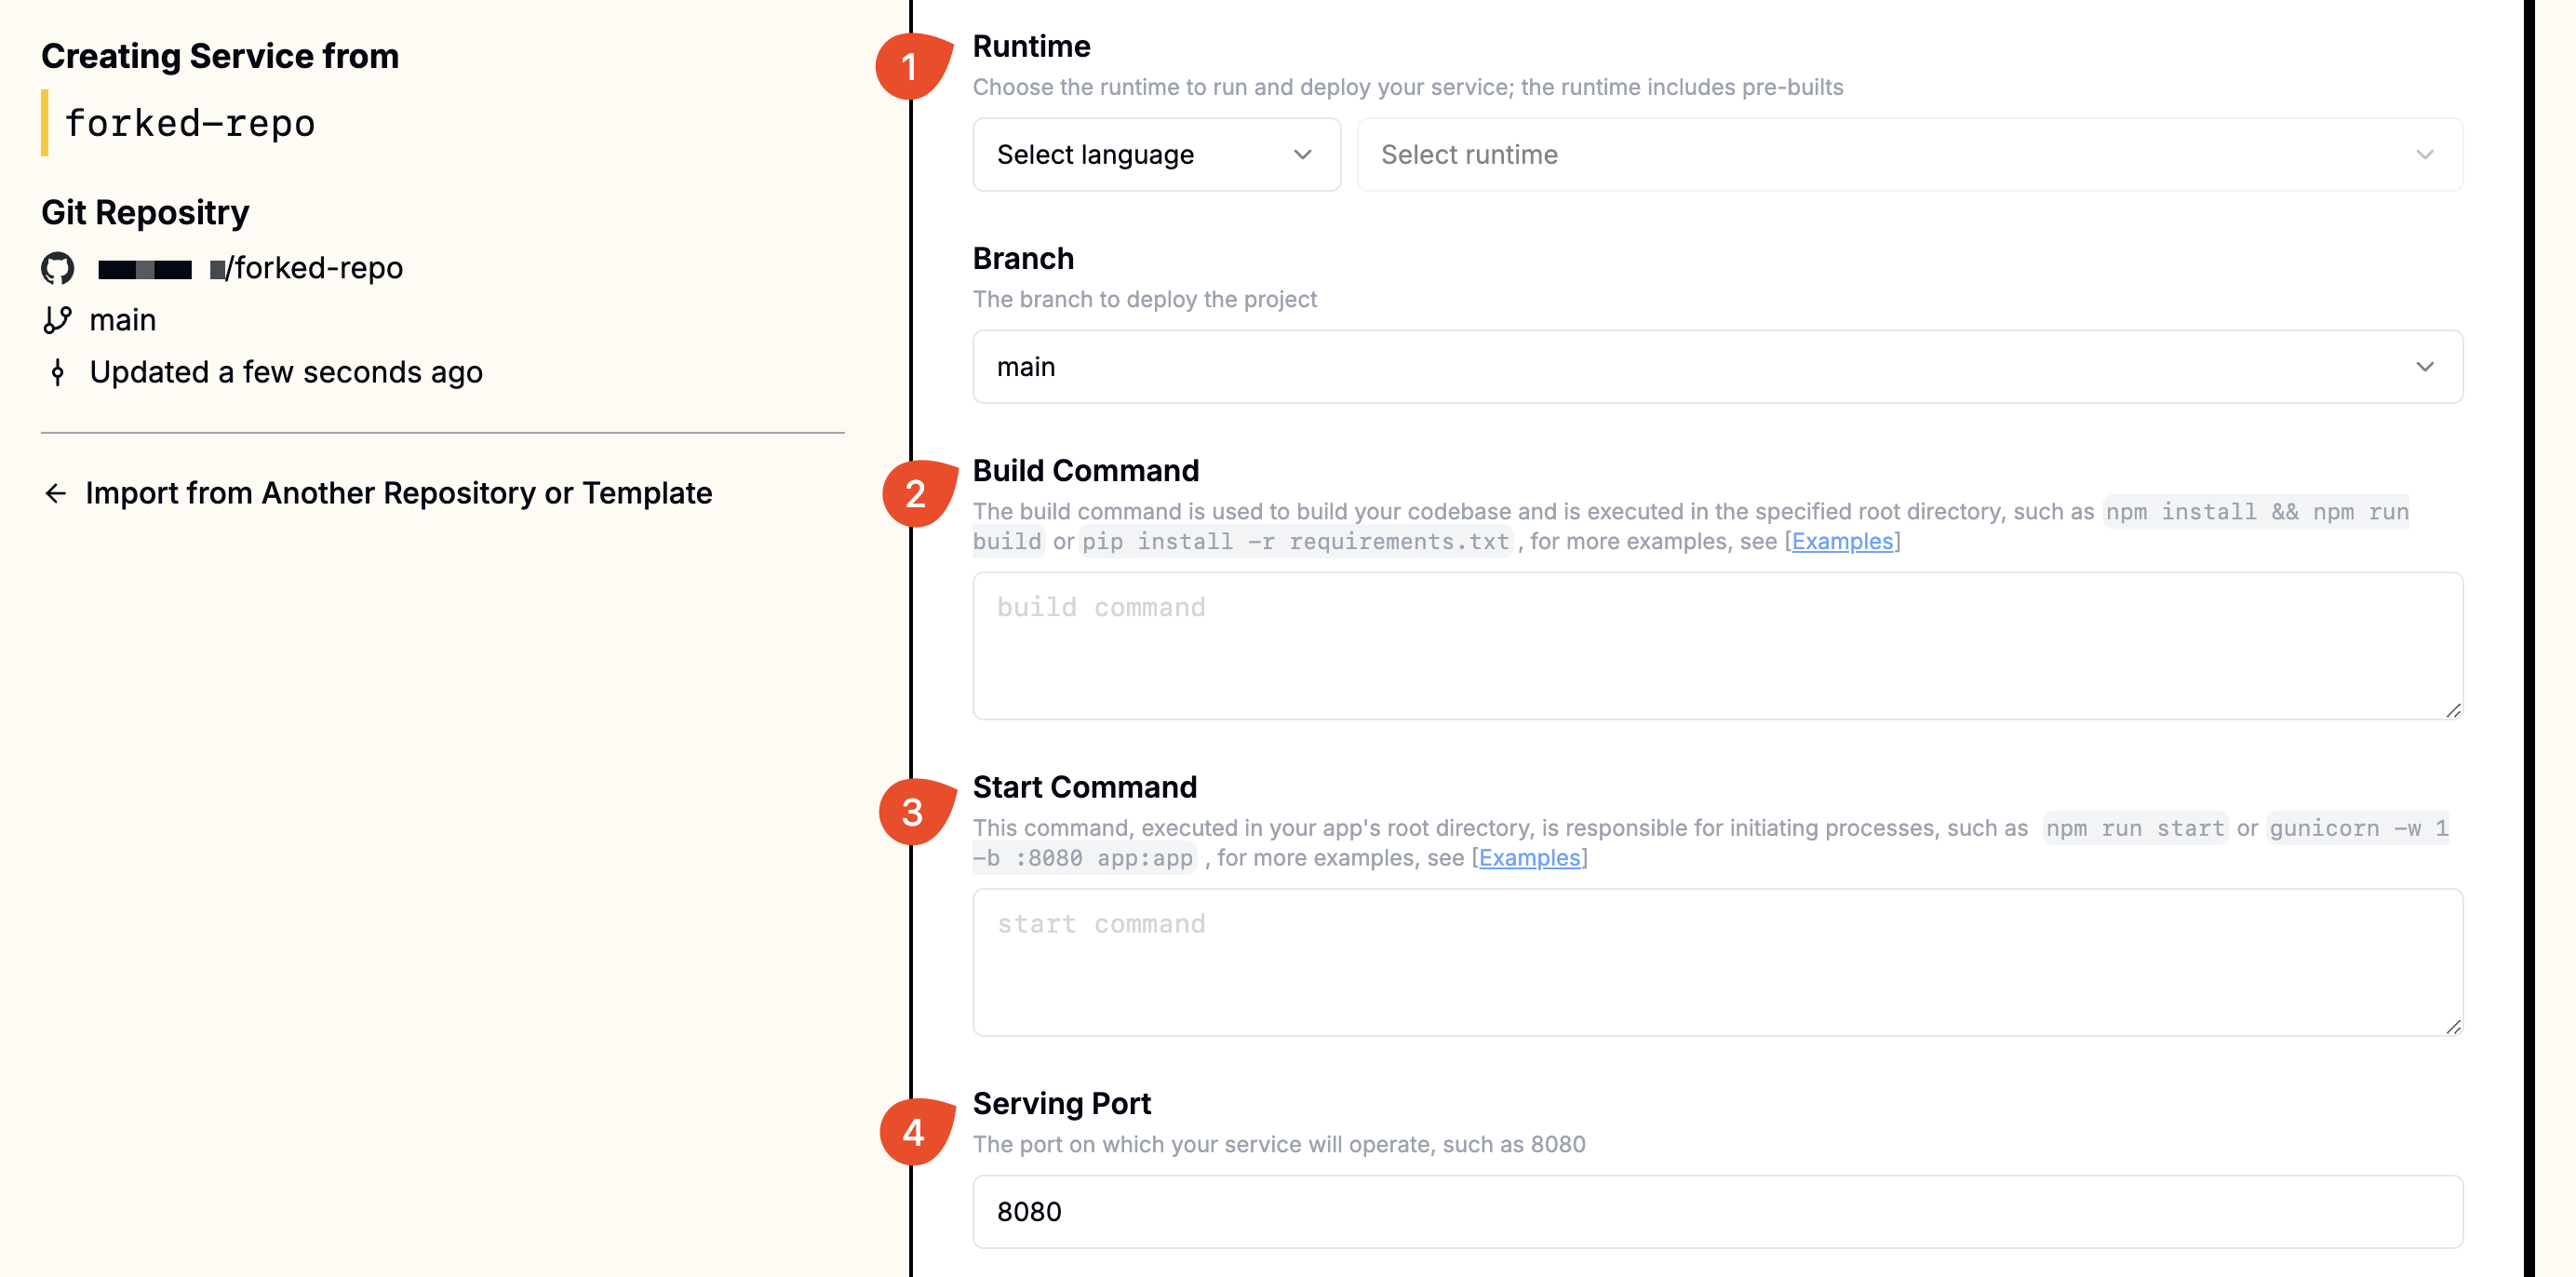
3. 作成時に次の値を指定します。
Hugging FaceモデルはPyTorchに基づいているため、torchとtransformersをインストールする必要があります。pip install torchを介してtorchを直接インストールすると、多くのCUDA関連コンポーネントが含まれます。LeapcellマシンにはGPUがないため、これによりイメージサイズが不必要に大きくなります。代わりに、CPUのみバージョンのtorchをインストールします。
pip install torch torchvision torchaudio --index-url https://download.pytorch.org/whl/cpu
さらに、モデルをロードする必要があります。
最終的なビルドコマンドは次のとおりです。
pip install torch torchvision torchaudio --index-url https://download.pytorch.org/whl/cpu && pip install -r requirements.txt && python load_model.py
また、Gunicornを使用してアプリを実行します。**gunicorn**がrequirements.txtに含まれていることを確認してください。
| Field | Value |
|---|---|
| Runtime | Python (Any version) |
| Build Command | pip install torch torchvision torchaudio --index-url https://download.pytorch.org/whl/cpu && pip install -r requirements.txt && python load_model.py |
| Start Command | gunicorn -w 1 -b :8080 app:app |
| Port | 8080 |
これらの値を対応するフィールドに入力します。
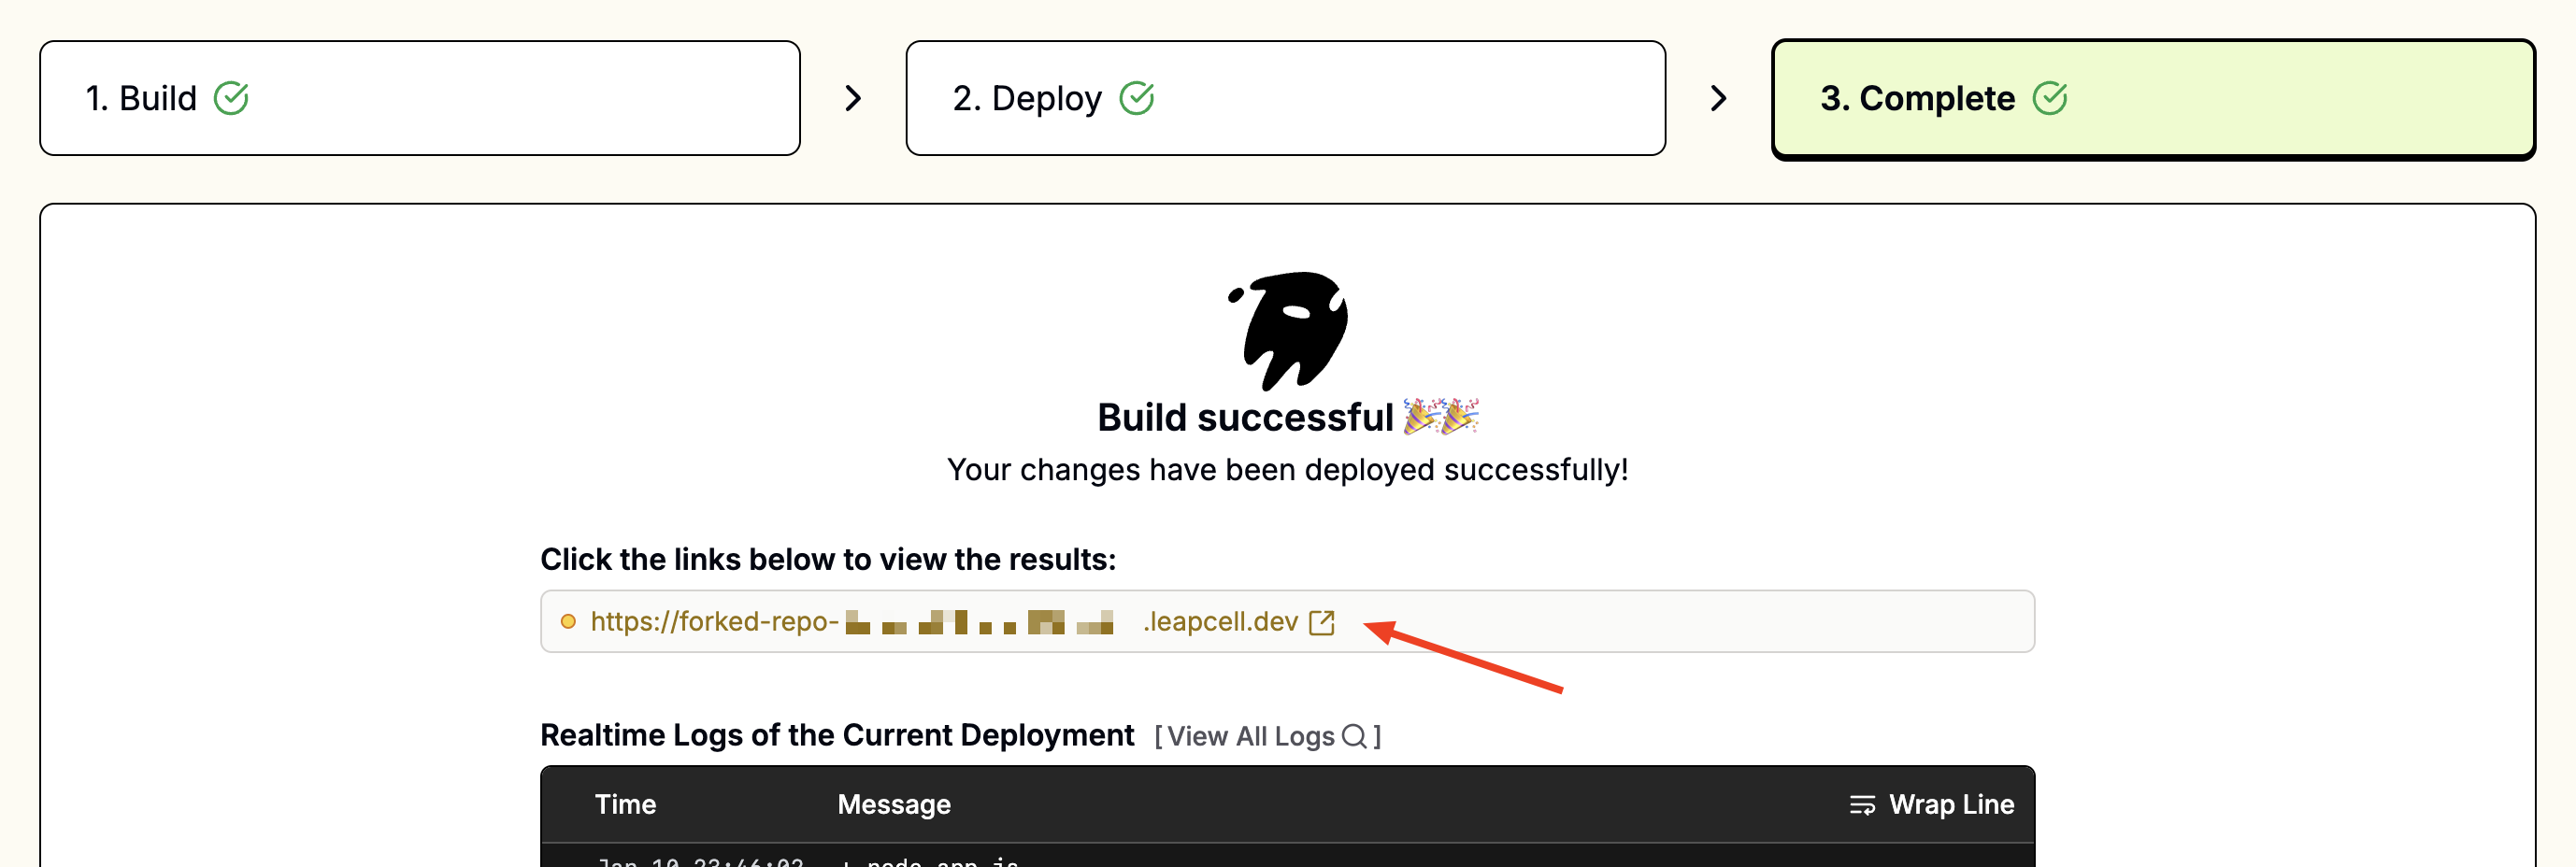
4. アプリにアクセスする:
デプロイされると、デプロイメントページにfoo-bar.leapcell.devのようなURLが表示されます。サービスページに表示されるドメインにアクセスします。
継続的デプロイメント
リンクされたブランチへのすべてのプッシュは、自動的にビルドとデプロイをトリガーします。失敗したビルドは安全にキャンセルされ、次回の成功したデプロイまで現在のバージョンが実行されたままになります。
継続的デプロイメントの詳細をご覧ください。