Creating a Application
1. Create an Application
Click the "Deploy GitHub Code" button on the left. You will see the following screen:
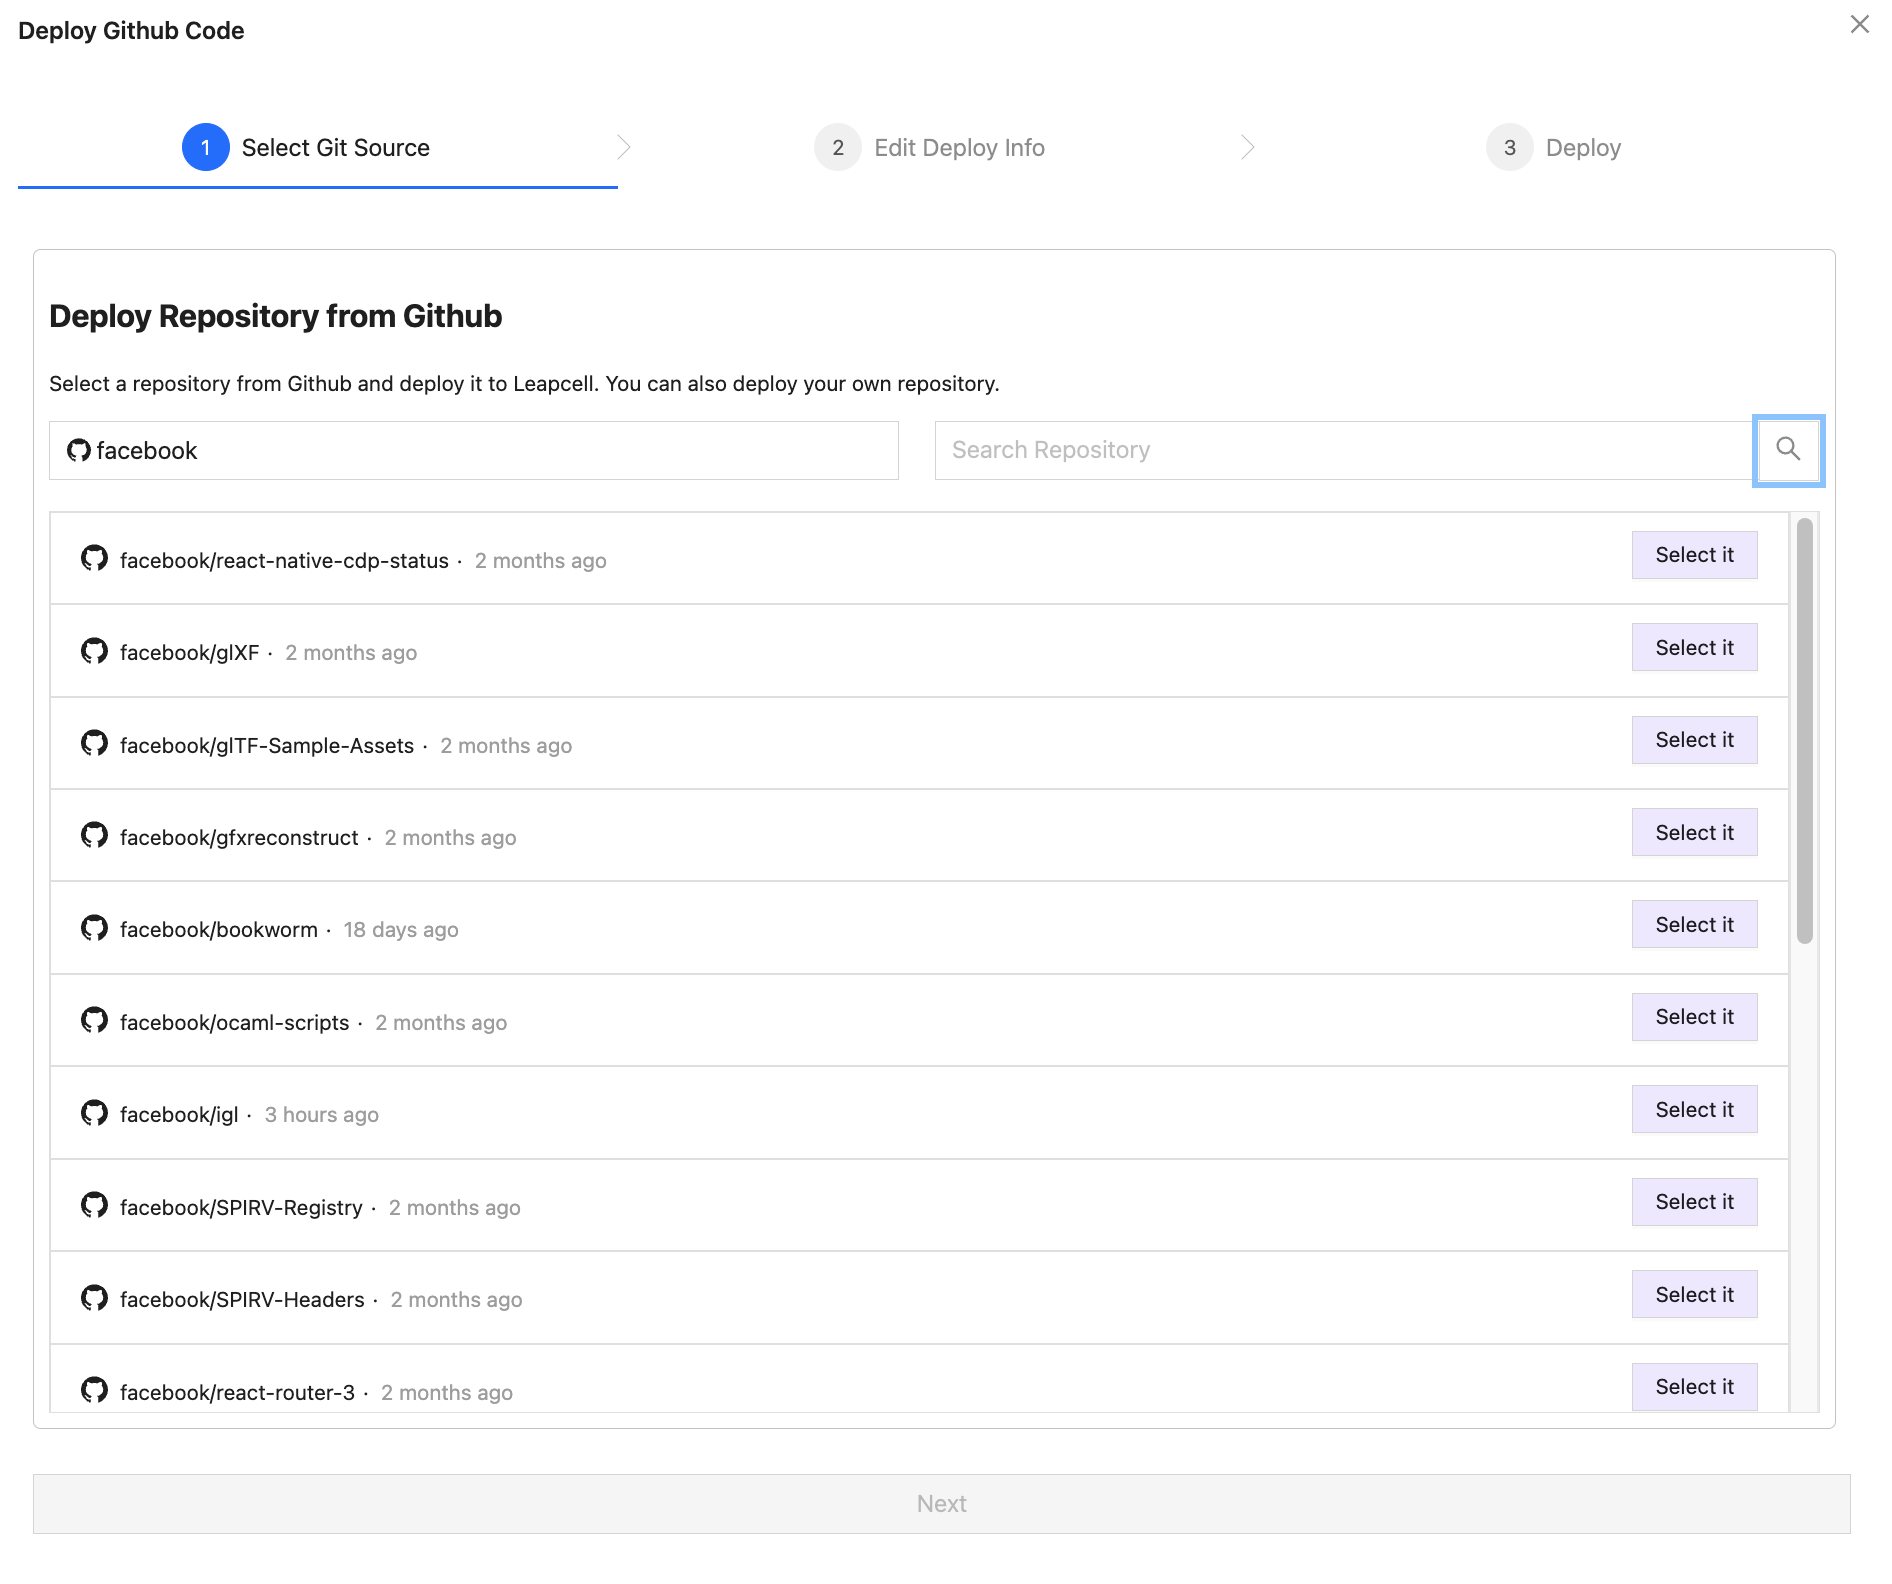
The icon next to "Github" represents the Github username. Use the search bar to find repositories under that user.
Example:
- Username:
leapcell - Search query:
blog
2. Provide Project Information for Packaging and Deployment
See the Deployment Form section below for the meanings of the deployment form fields.
Click the "Next" button. You will see an information confirmation page. After confirming, click the "Deploy" button, and your service will start packaging and deploying.
3. Wait for Deployment
See the Packaging and Deployment section below.
Packaging and Deployment
Packaging involves bundling your code and dependencies into an image. Leapcell uses Kaniko for packaging, and the process takes place in a sandbox.
After packaging, the service is automatically deployed.
How to Package and Deploy
Click the "Deploy" button in the upper right corner of the Service page. You will see the following screen:
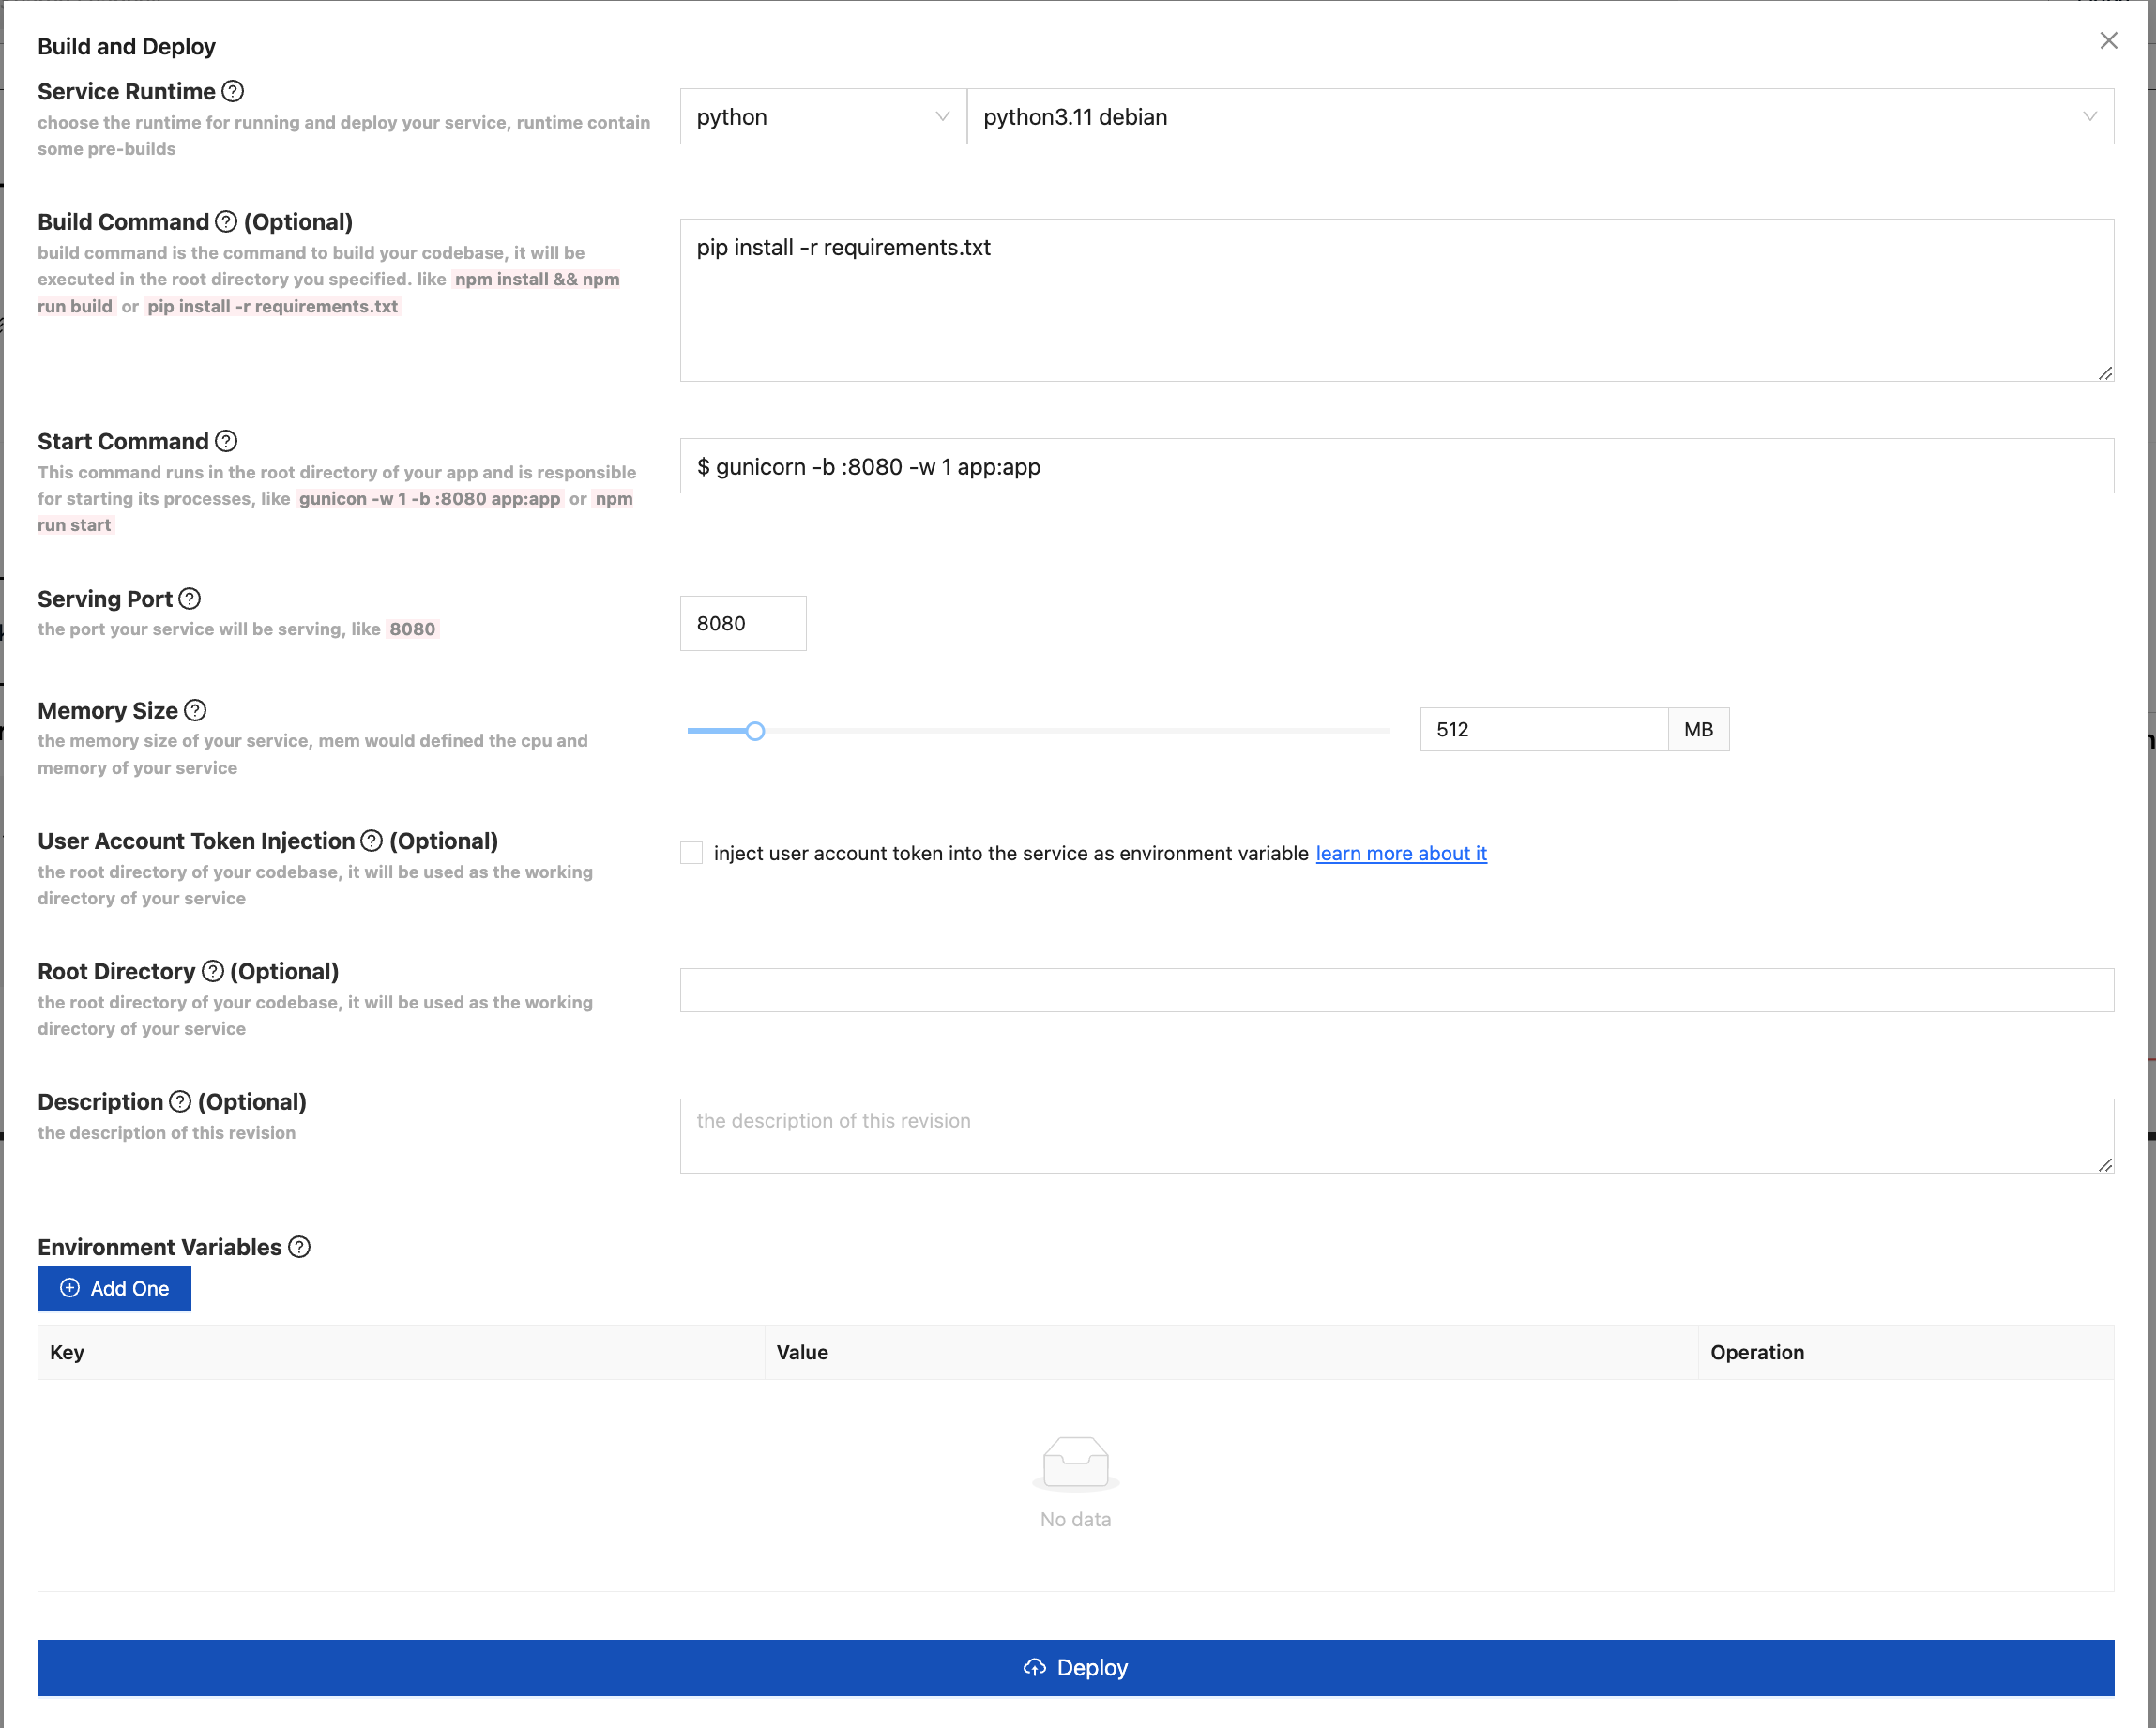
Fields to fill include:
1. Runtime
Choose your desired runtime. If you are unsure, you can select "Python Alpine," which is the minimal Python runtime.
Examples:
- Python developer needing the
requestslibrary: Choose "Python Alpine." - AI developer needing
TensorflowandPillow: Choose "Python Debian."
2. Build Command
The Build Command is the packaging command. Essentially, you need to enter a bash script to package your service.
Examples:
Python developer needing the
requestslibrary:pip install requestsWeb developer needing
Flaskandgunicorn:pip install -r requirements.txtNext.js developer (using standalone mode):
Add the
deploycommand to yourpackage.json:"scripts": {
"dev": "next dev",
"build": "next build",
"start": "next start",
"lint": "next lint",
"deploy": "next build && cp -r .next/static .next/standalone/.next/ && cp -r public .next/standalone/"
},npm install
&& npm run deploy
- AI developer needing `Tensorflow` and `Pillow`:

```bash
apt-get update && apt-get install -y libsm6 libxext6 libxrender-dev
pip install tensorflow pillow
3. Start Command
The Start Command is the command to start your service. Essentially, you need to enter a bash script to start your service.
This command executes each time the service starts. Therefore, it is best to keep it as fast as possible. Avoid starting multiple workers or processes, as this can lead to longer cold start times.
Examples:
Python web developer using
Flask:gunicorn -w 1 -b :8080 app:appExpress.js developer:
node app.jsNext.js developer:
Because Next.js needs local storage for caching, it is recommended to use the standalone mode. Prepare a script
run.sh:run.sh#!/bin/sh -x
[ ! -d '/tmp/cache' ] && mkdir -p /tmp/cache
node .next/standalone/server.jsStart Command:
./run.sh
4. Serving Port
The Serving Port is the port on which your service runs. Leapcell uses this port to confirm that your service has started successfully. If your service starts successfully but does not listen on this port, Leapcell will consider it a failure with a timeout.
It is generally recommended to use port 8080.
5. User Account Token Injection
This option injects the following environment variables if selected:
| Environment Variable | Description |
|---|---|
| LEAPCELL_API_KEY | Your Rotation API Token |
6. Root Directory (Optional)
The Root Directory is the root directory of your code. If your code is in the root directory, you can leave this field empty. If your code is in a subdirectory, enter the name of the subdirectory (e.g., src).
7. Environment Variables
Environment Variables allow you to set environment variables for your service. You can set them here, and they will override environment variables set in the Panel's Environment section. These variables are private and encrypted, making them suitable for sensitive information.
If left blank, default environment variables will be used.
8. Deploy
Click the "Deploy" button, and your service will start packaging and deploying. You will see the following page:
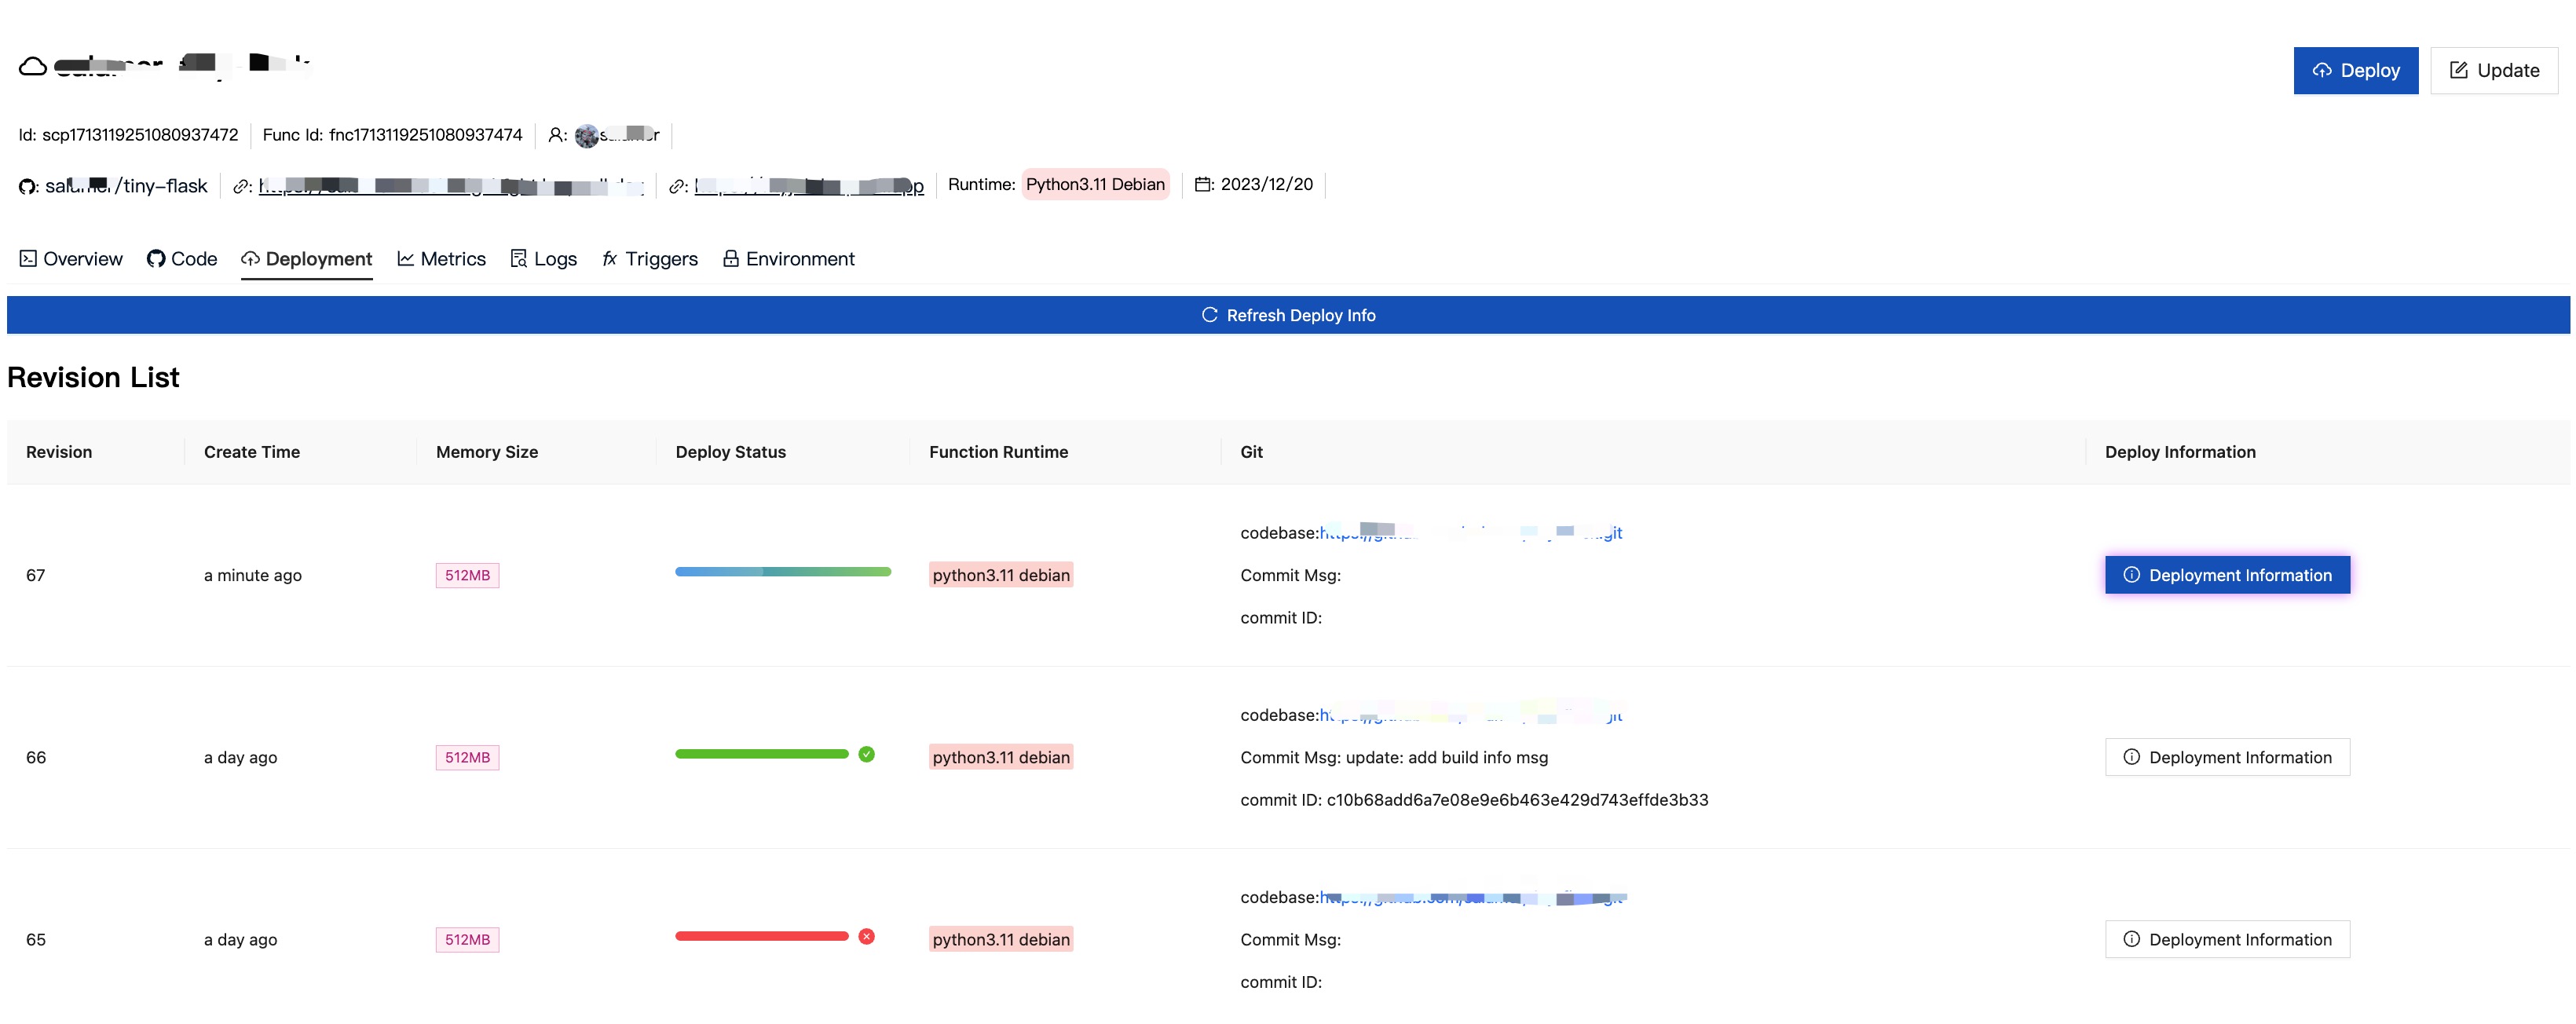
The status indicates that packaging is in progress. Click the "Deployment Information" button to view real-time packaging logs:
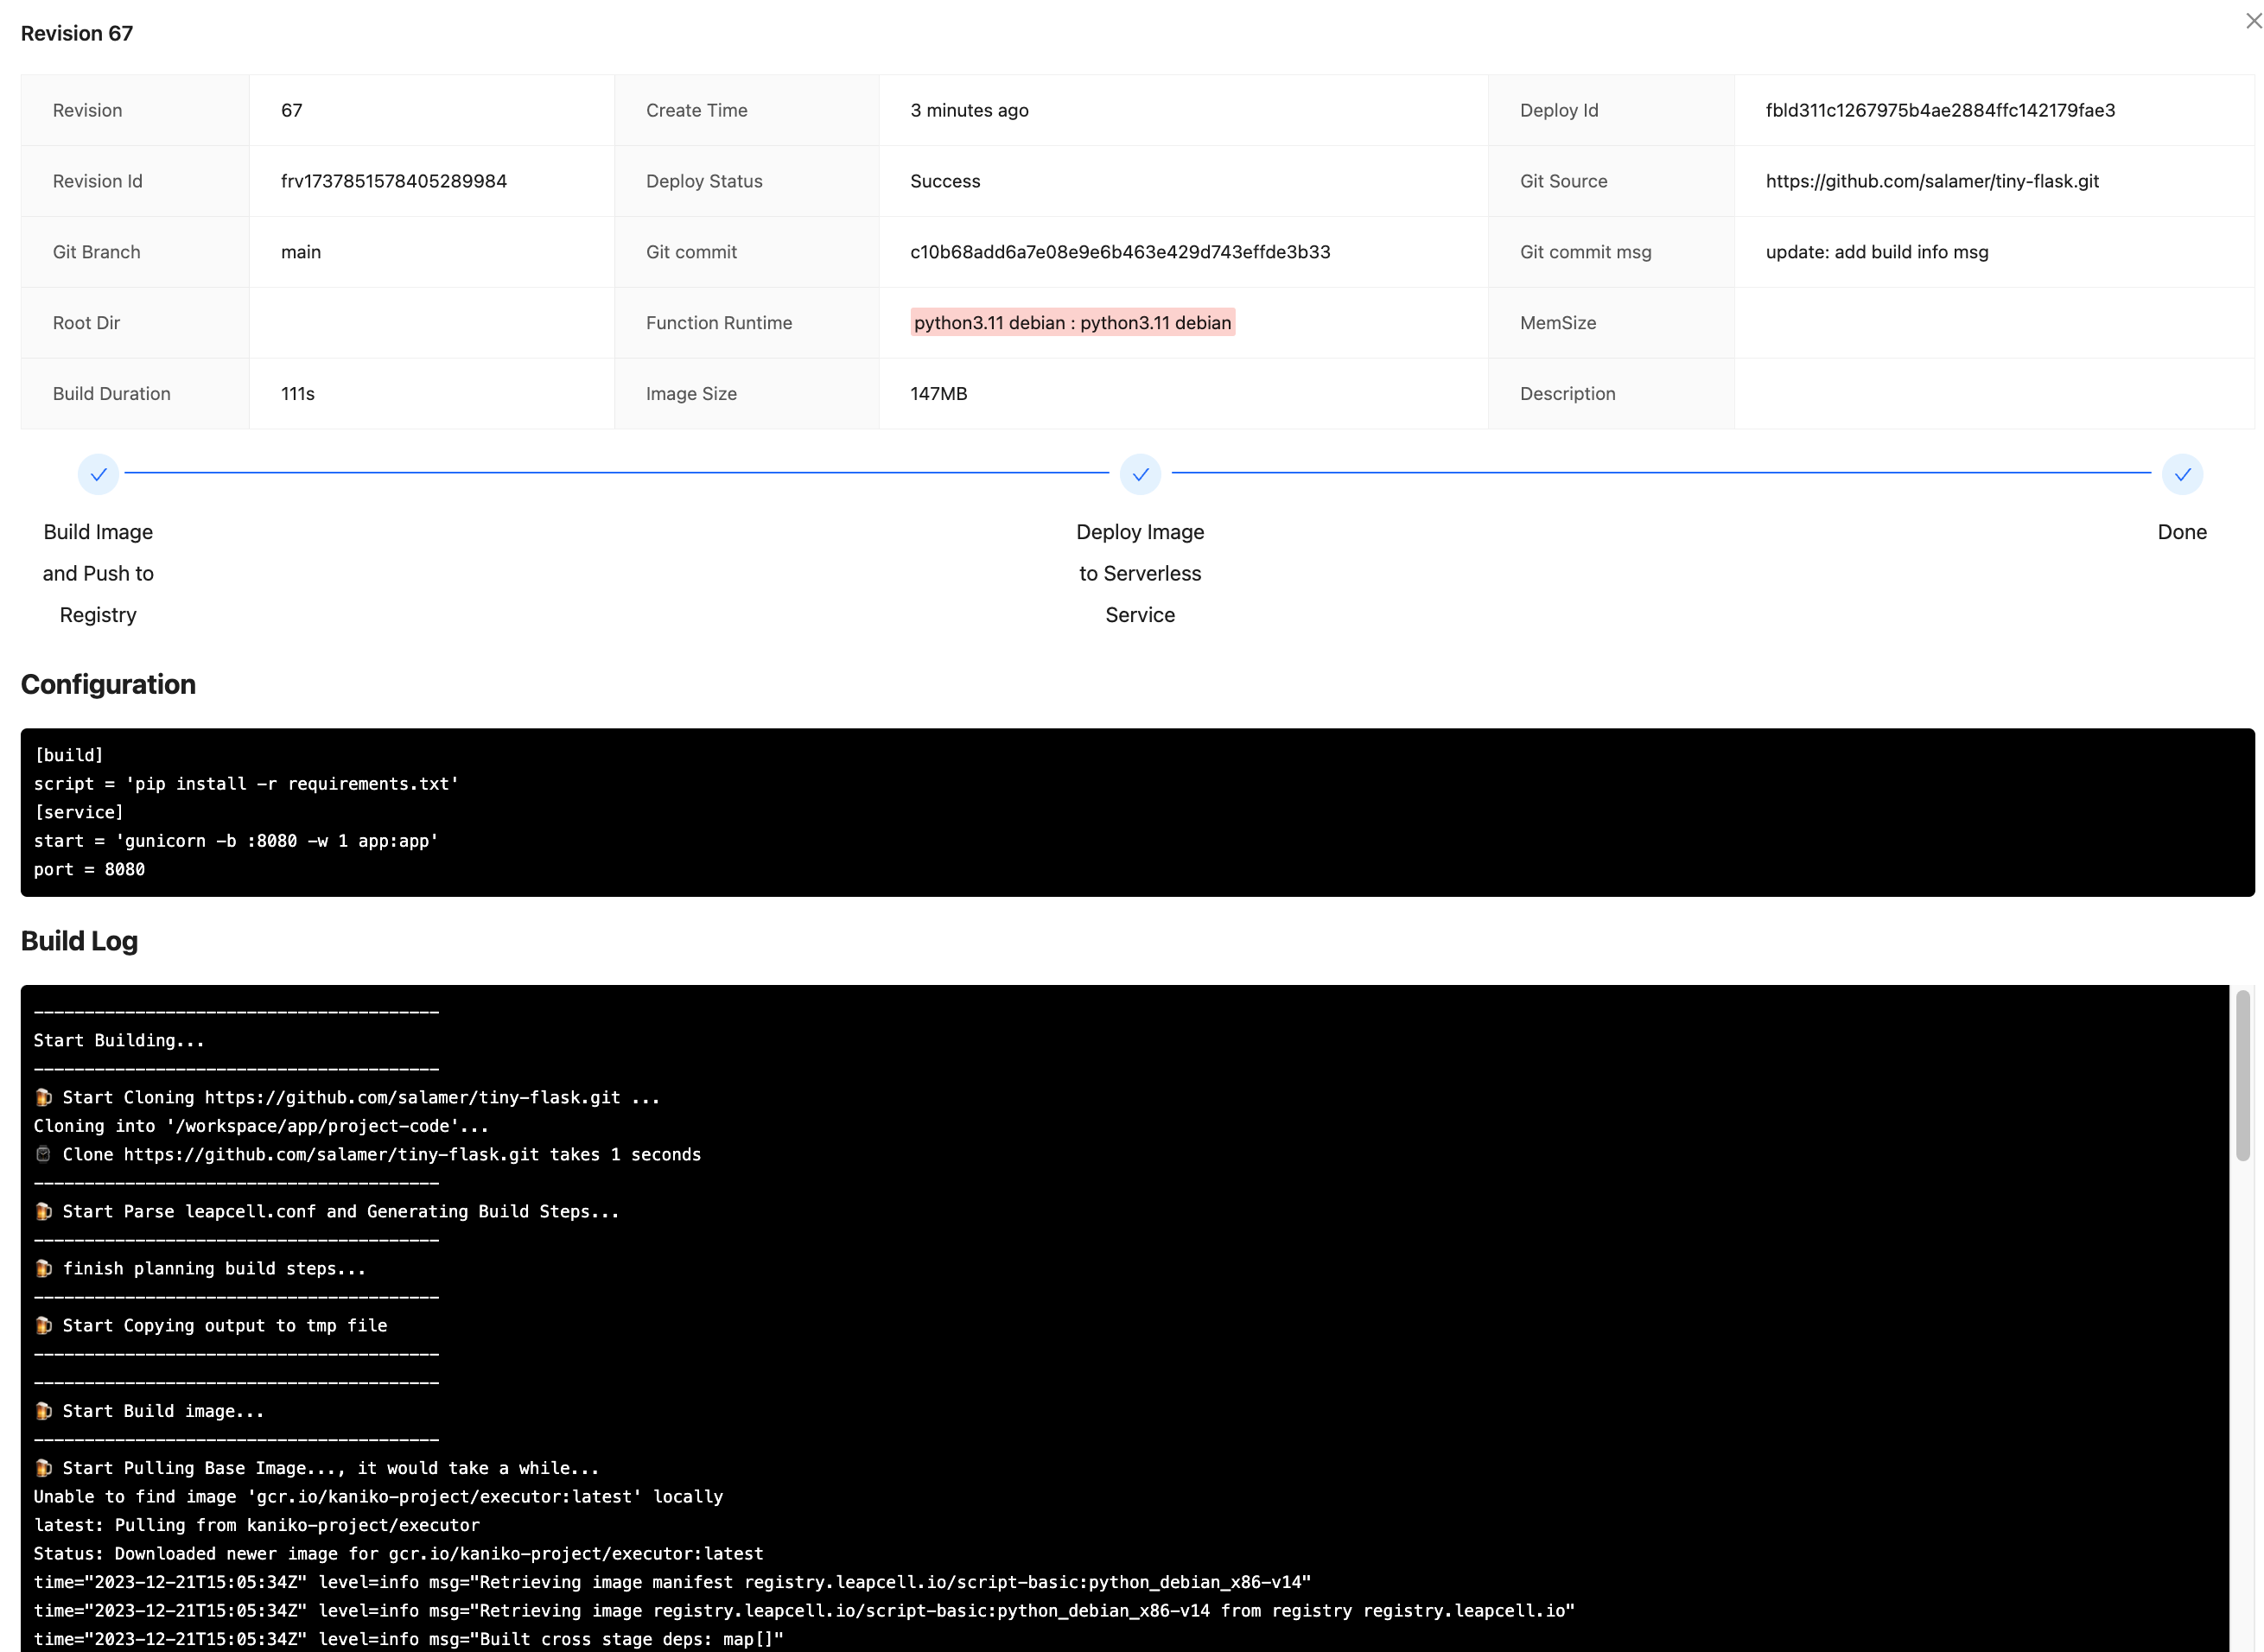
After waiting for about a minute, you will see:
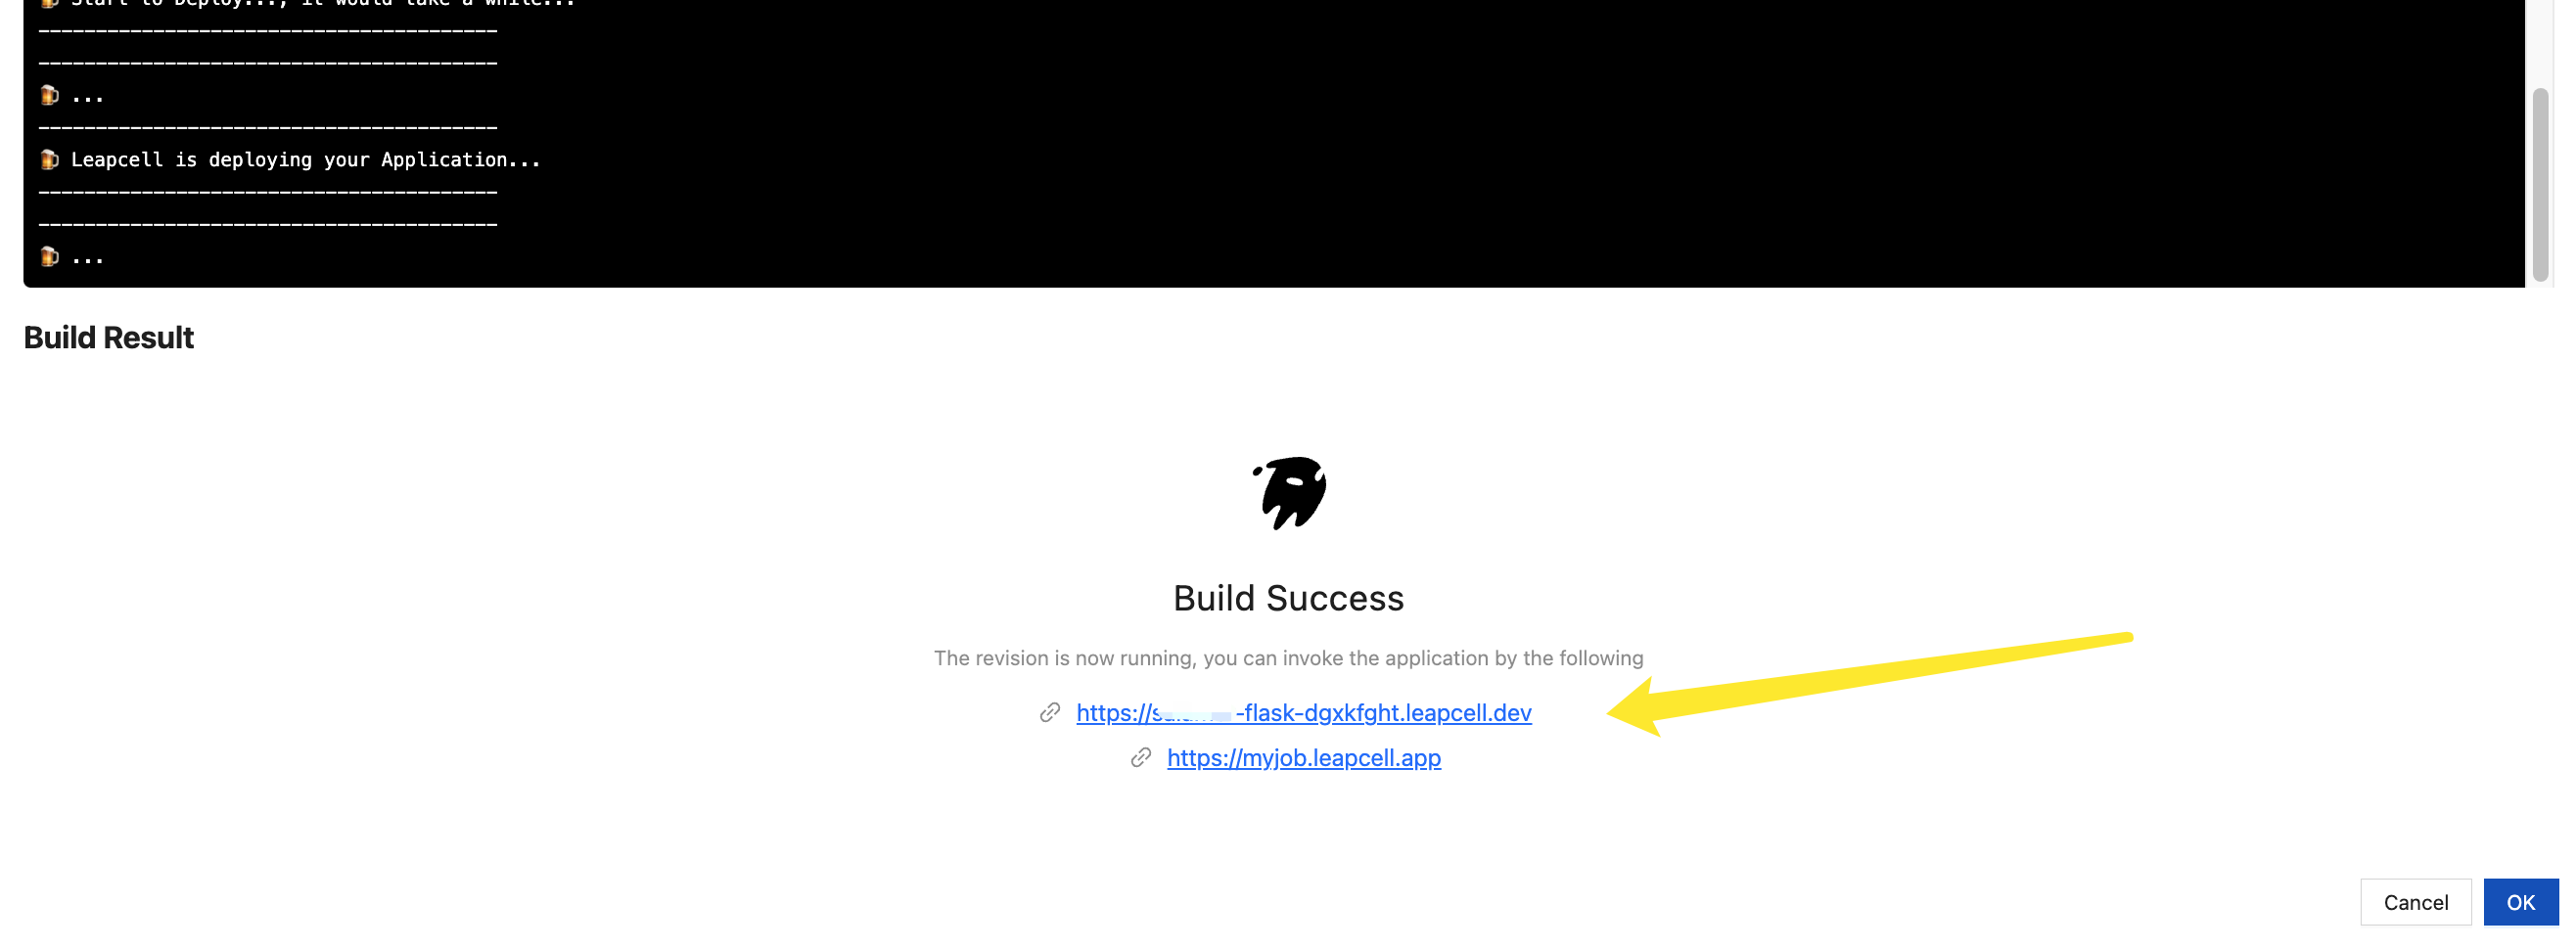
Click the arrow icon, and you will see information about your service.
9. Deployment Failure
Packaging Failure
If your service fails to deploy, click the "Deployment Information" button to view real-time packaging logs. You can use the logs to determine the reason for deployment failure.
Startup Failure
If you deploy successfully but encounter failure when clicking the HTTP URL, refer to the section on Observability for debugging.